Git Version Control (Usage)
You now have two copies of your psy1903 repository:
- The local copy that exists on your computer
- The central copy that exists on Github.com
Periodically and when you make notable changes to your local copy, you will need to “check in” those changes with the central copy that exists on Github.com so that everything remains in sync.
It will be important that things remain in sync, because when you share your code with classmates or instructors (for assistance or grading purposes), you will want to make sure they’re seeing the most up to date version of your work on Github.
Additionally, each check-in will contribute to your Git version control history which will keep track of what changes were made to your code base over time. This history can be useful to look back on. For example, imagine a scenario where a few days ago your code was working exactly as expected, but now after making some changes things have gone horribly wrong and you’re not sure why - if you have a good Git history, you can look back at the code when it was in a “working state” for reference. With Git, it’s even possible to revert a code base back to a previous state in the Git history which can be extremely helpful at times.
That’s all the “why” you’ll want to keep your repositories in sync and maintain a good Git history, let’s get into the “how”...
Procedure
Any time you make a change to your local repository (changing code in a file, adding a new file, deleting a file, moving a file), Git will observe that change and you’ll see it listed in VSCode’s Source Control panel under Changes.
When you reach a point where you wish to check in (aka sync) your changes from your local repository to your central repository on Github, you need to complete these three steps:
- Stage (aka add) any/all changes you wish to track.
- Create a commit which bundles together all your staged changes. Each commit should include a brief message summarizing the changes being made in the commit.
- Push the commit to your central repository on Github.com.
Let’s see that process step by step.
First, make the following two changes to your code base:
Change 1 - Edit existing file
Update psy1903/README.md adding your name:
# psy1903
## Susan Buck
Course work for psy1903
Change 2 - Add new subdirectory and file
Create a new subdirectory and file at psy1903/web/week2/app.js with this content:
console.log('Hello World!');
Add/stage changes
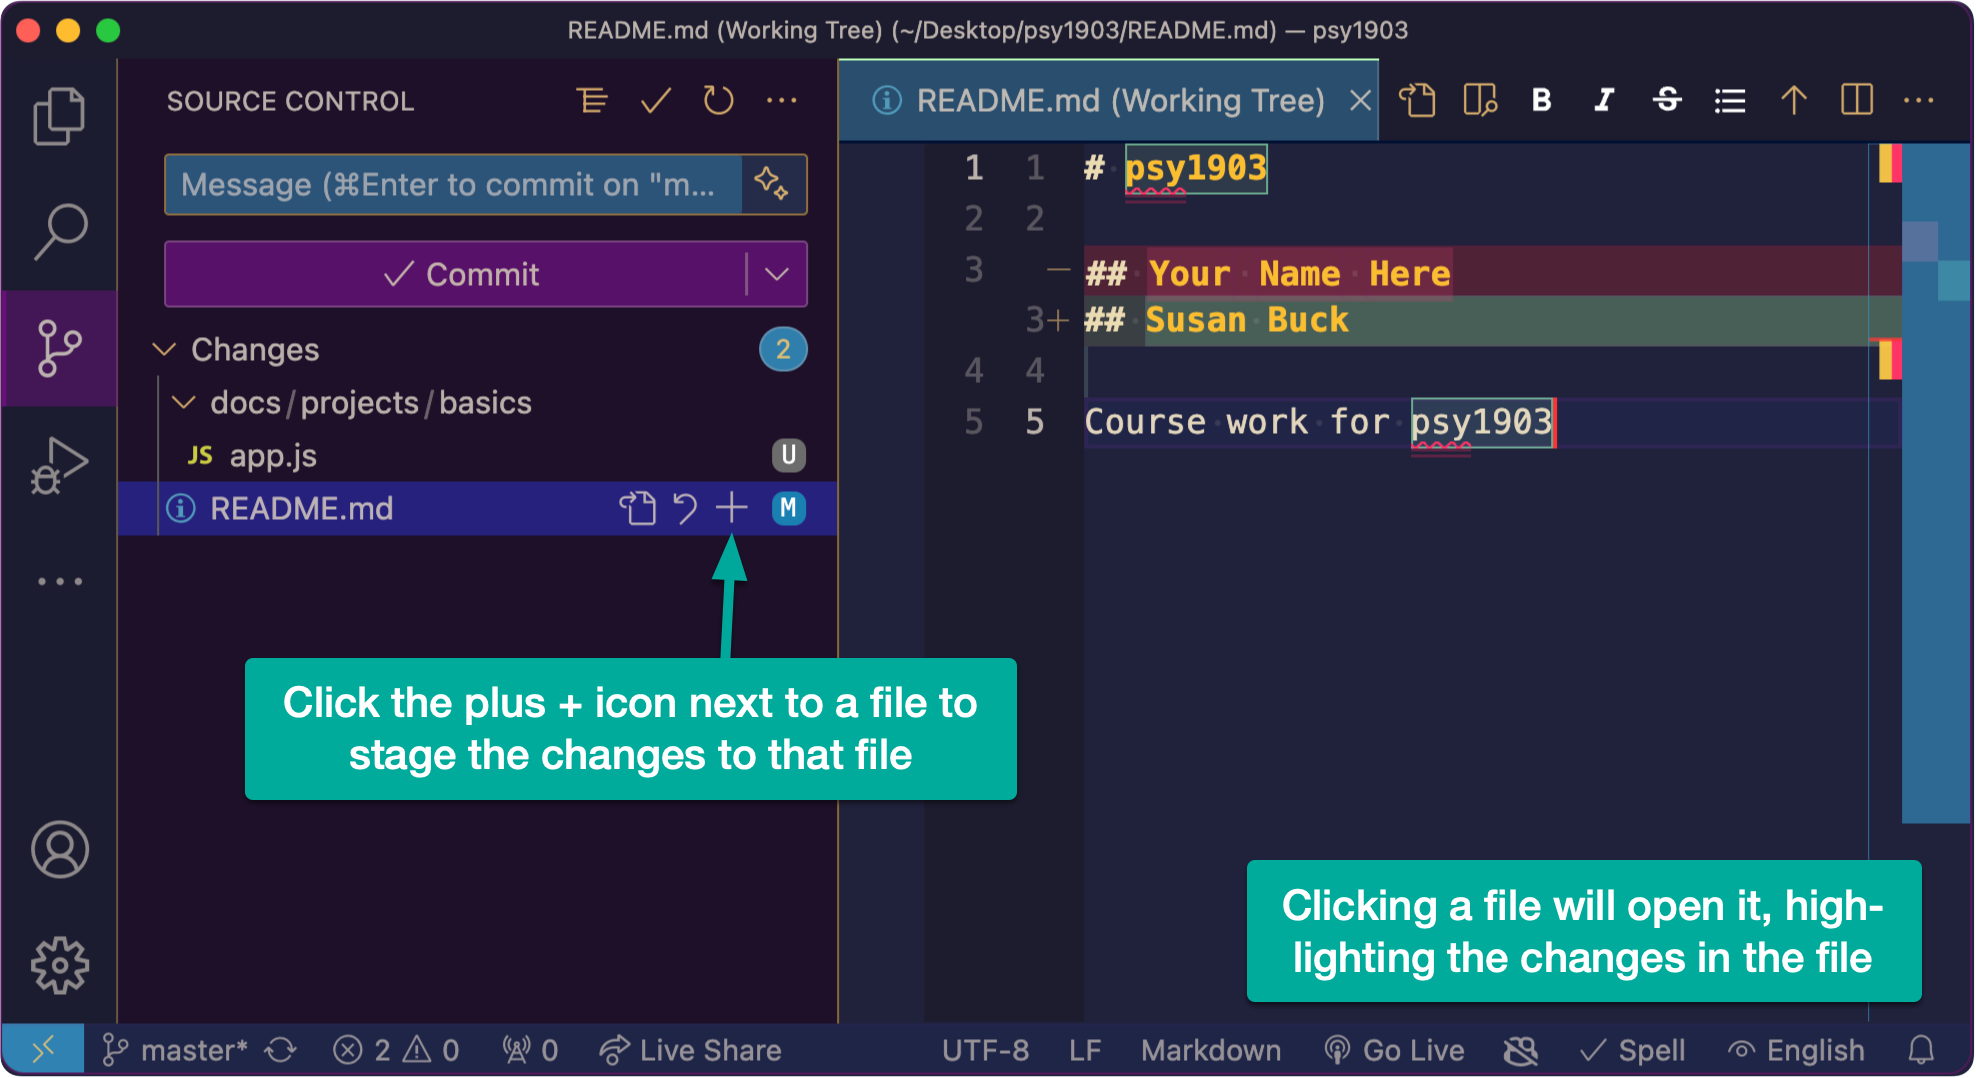
After completing the above changes, you should see both of the impacted files listed under Changes in the VSCode source control panel. Clicking on either of the files will load it in the editor and it will highlight the changes. Clicking on the plus + icon next to each file will stage (or add) those changes.

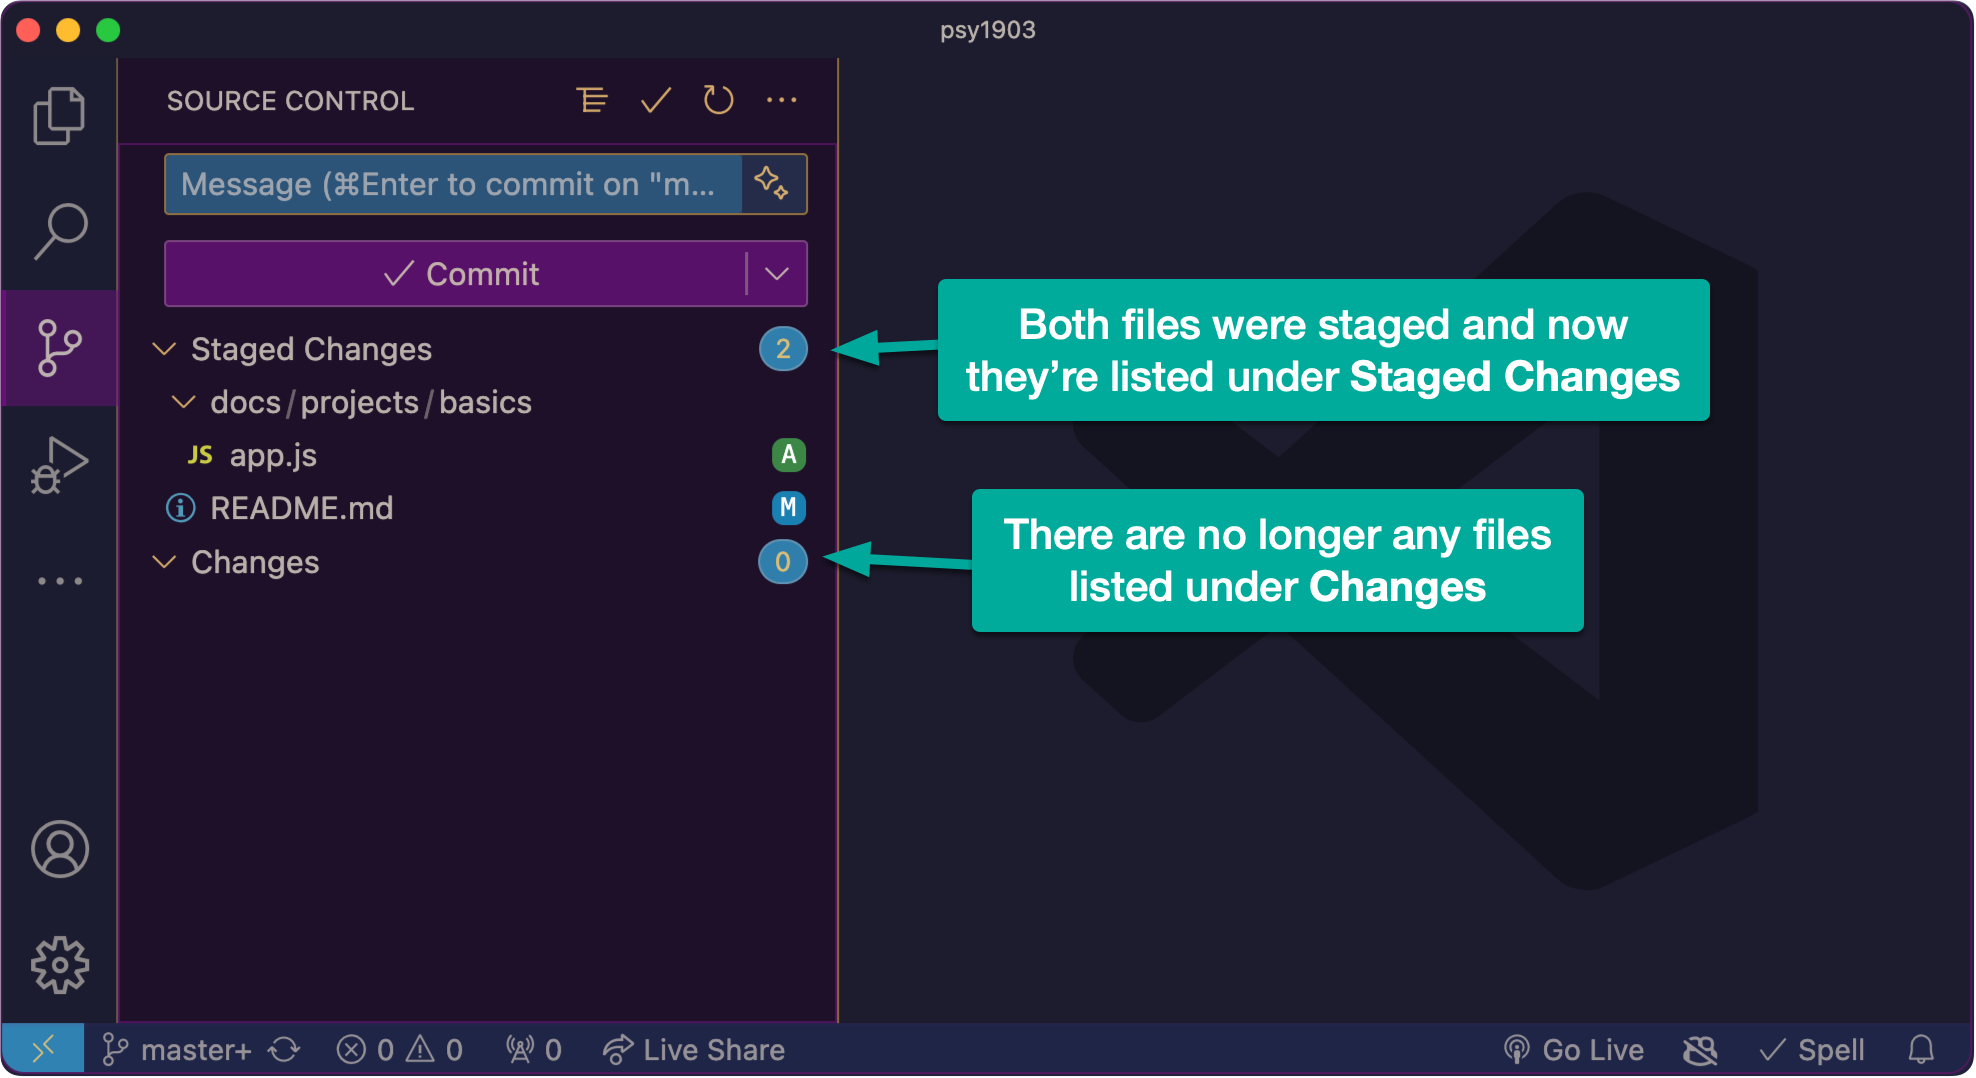
After clicking the plus + icon next to both files you changed, you should see this:

Make a commit
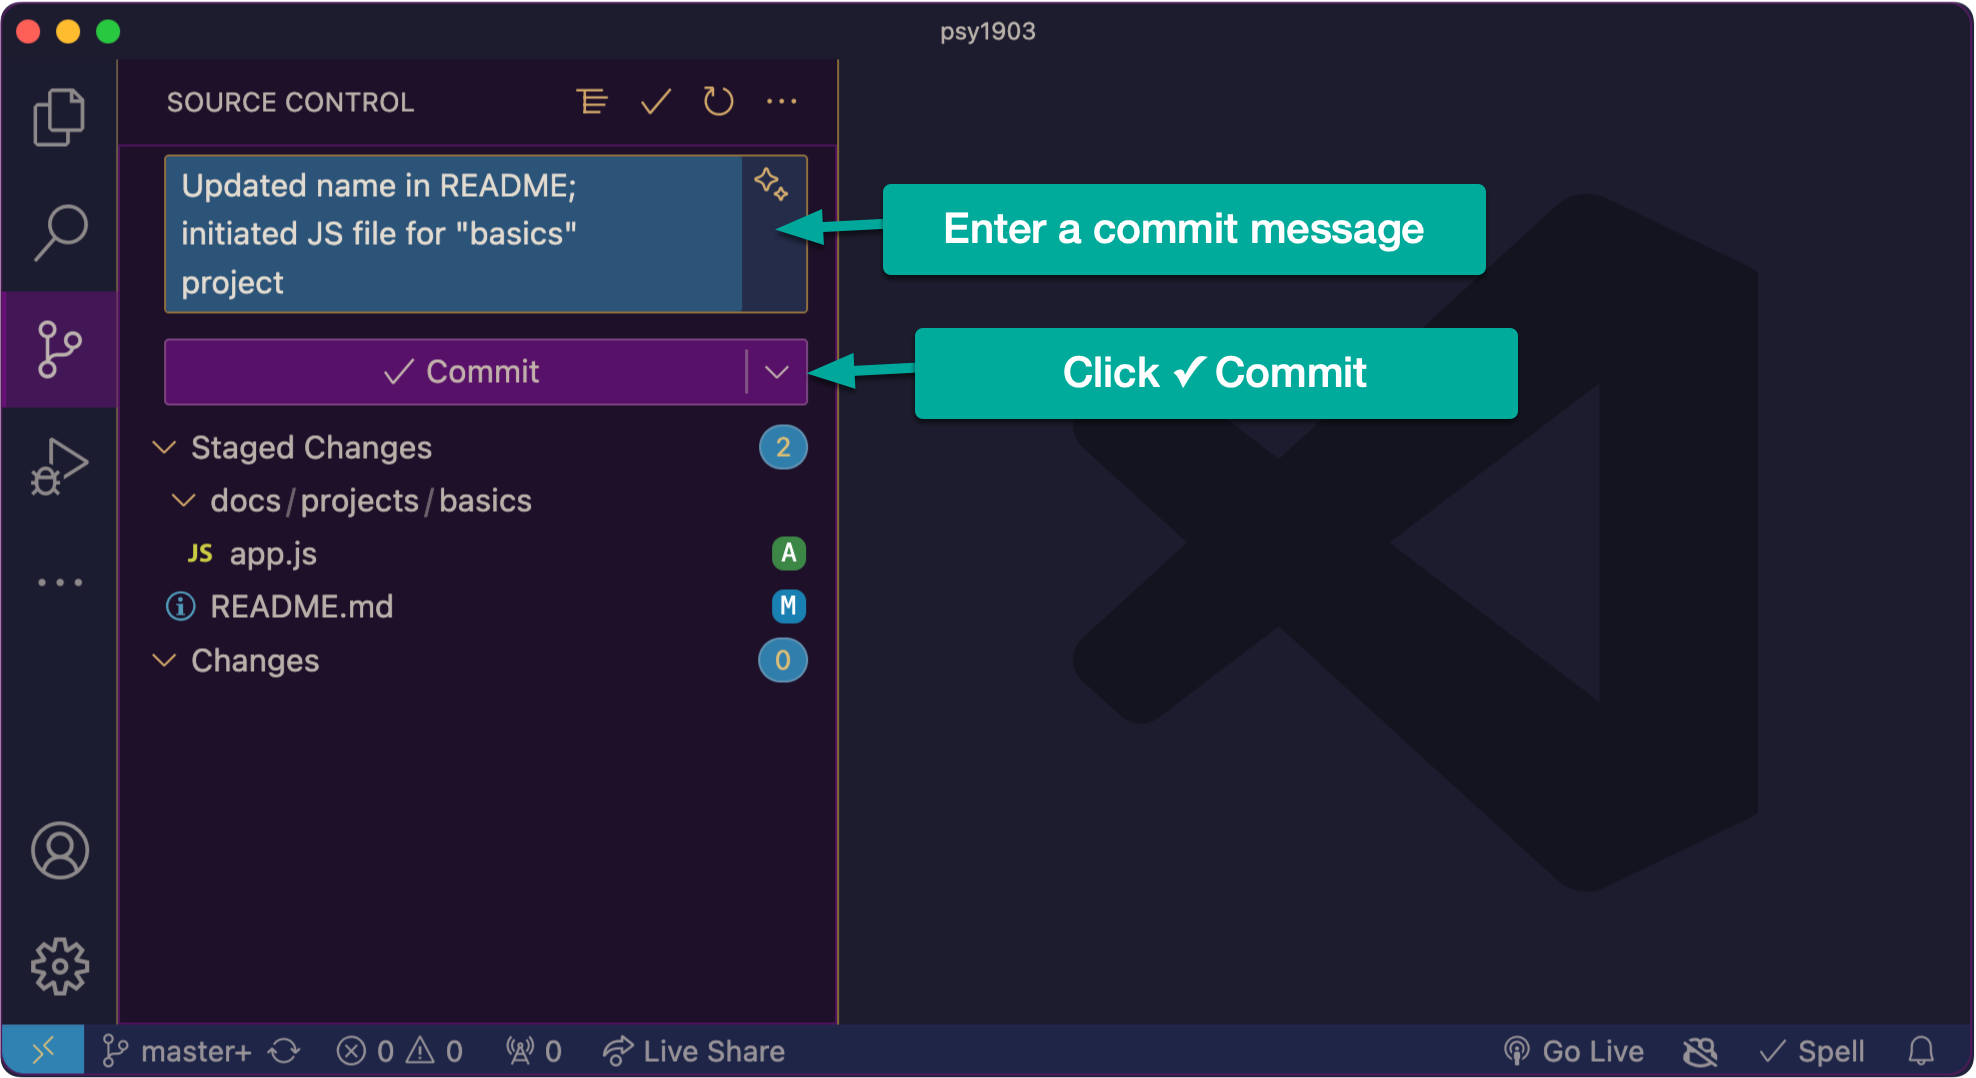
With your changes staged, you can now initiate a new new commit by filling in a commit message containing a brief summary of the changes, then click the Commit button:

Push to Github
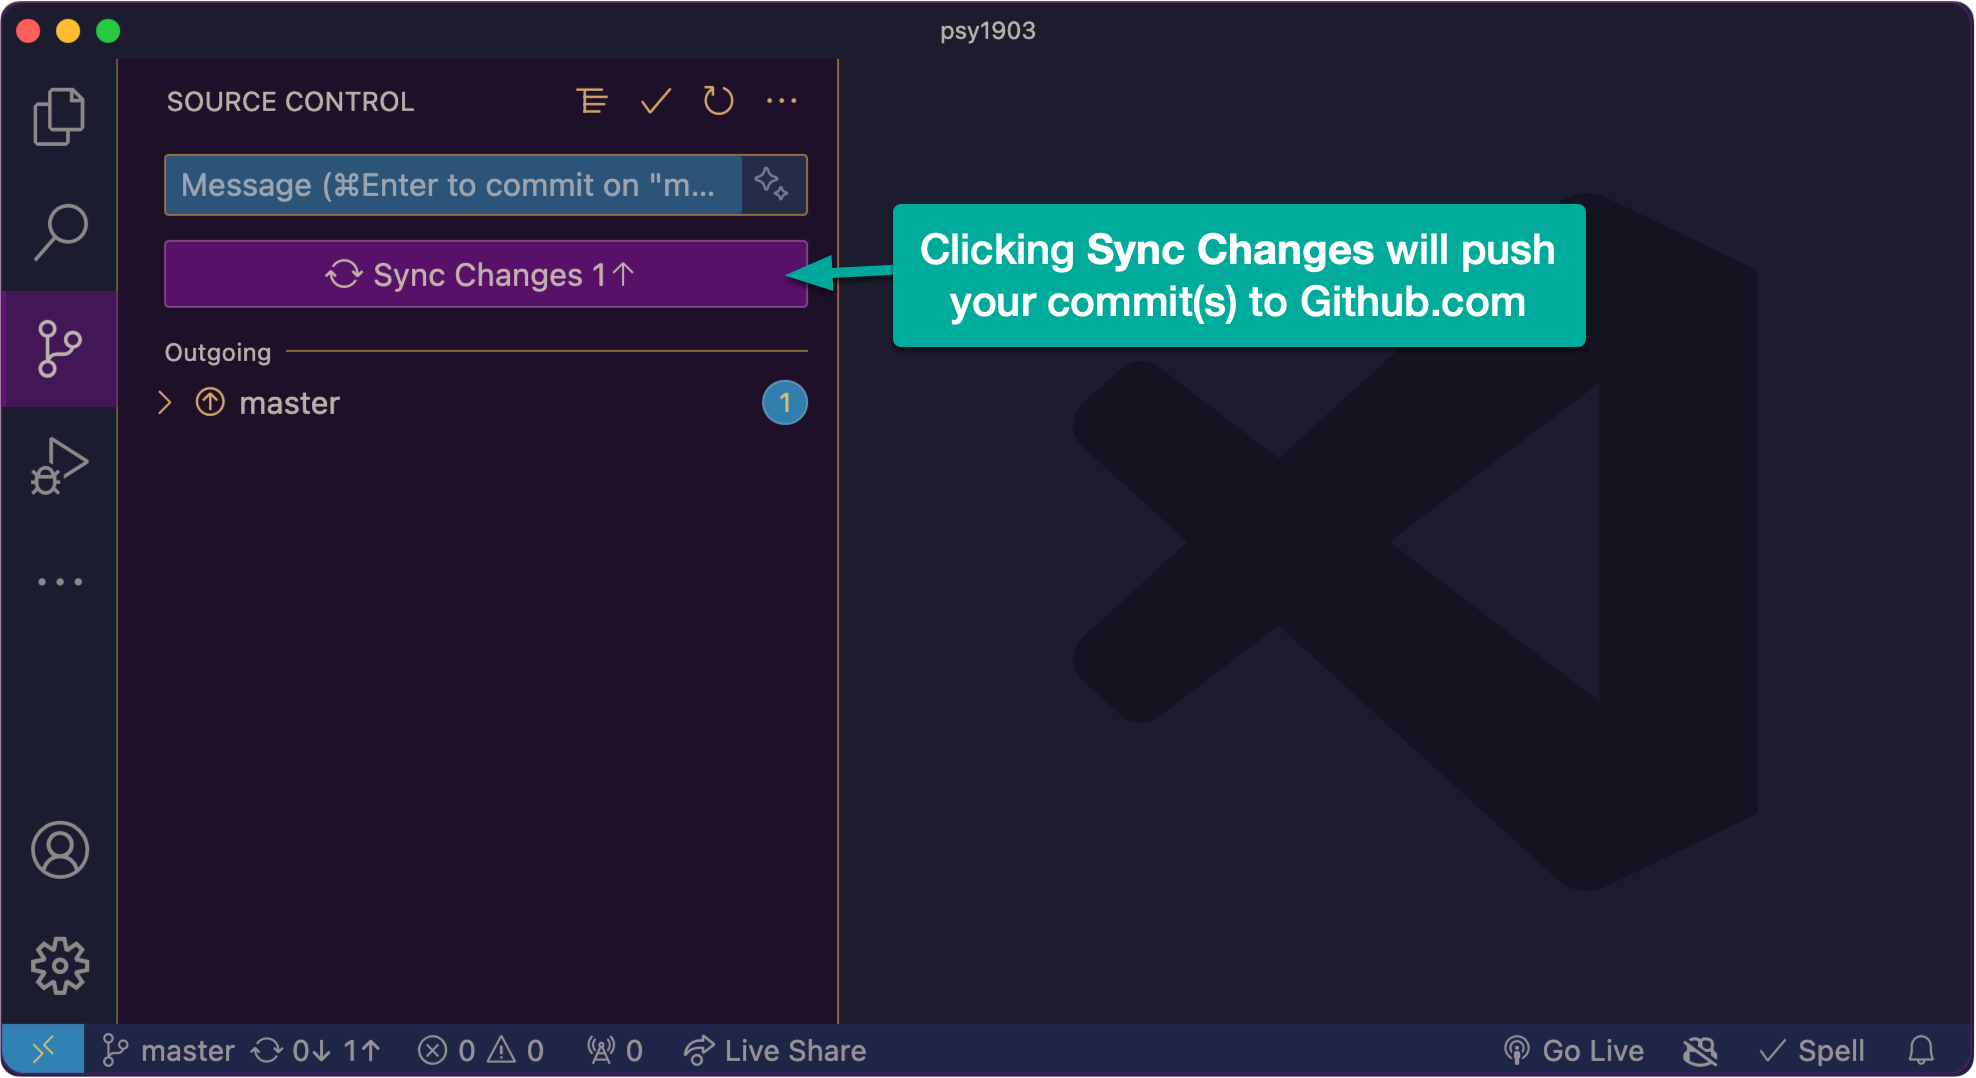
Finally, click Sync Changes to push your commit(s) to your central repository on Github.com:

If you visit your repository on Github, it should match your local repository with the updated psy1903/README.md file and the addition of the psy1903/docs/projects/basics/app.js file. Furthermore, if you visit your commit history on Github, you can see a history of commits made to this repository so far.
Summary and check-in best practices
With the above steps complete, we now see the process for keeping our local and central repositories in sync. You will repeat this process at notable points in your code writing process. For example:
- When a course-related task is complete and ready for grading, sync all related files to Github so they’re available for grading
- Before emailing an instructor for help with code so we can see the latest changes to your files exactly as you’re seeing them on your end.
- Periodically, it’s a good idea to make a commit just to save your work in progress. For example, let’s say you spent an hour or so working on a task and that task is not yet complete, but you have to stop working to run to class - go ahead and make a commit just to save your progress/work at that point. You might also want to make commits when you reach notable points in your development process - for example, imagine you’re working on a problem in a task set and you complete that problem. Go ahead and create a commit before moving on to the next problem.
- If in doubt, commit early and often. There’s nothing worse than pouring hours into a task, getting everything working as expected, only to have some glitch mess up your work. If you’re making periodic check-ins, you’ll always have a history of progress to refer back to.
All of the above suggestions on check-in best practices are appropriate for the context in which we’re working. If you were storing professional research work in a repository that you shared with collaborators, you might be more restrictive about the commits you make, waiting only until work was “production ready” before committing.