OSF via DataPipe
About OSF and DataPipe
OSF.io, or the Open Science Framework (OSF), is an open-source platform designed to facilitate open and reproducible research. Developed and maintained by the Center for Open Science (COS), OSF aims to support researchers throughout their project lifecycle by providing tools to manage, share, and collaborate on research projects.
In this course, we will learn how to use OSF’s platform to collect and store data. In order to pipe data to the OSF platform, we will use a tool called DataPipe that is managed by the creators of jsPsych.
OSF Sign up
To get started, visit https://accounts.osf.io/login and choose Sign in via institution then follow the instructions provided.
Generate OSF Access Token for DataPipe
Once signed up and logged into OSF, we need to create a OSF security token that will allow our account at DataPipe (to be created in a moment) to communicate with our account at OSF.
To do this, under Settings > Personal Access Tokens (https://osf.io/settings/tokens) click Create Token and fill in the details as follows:
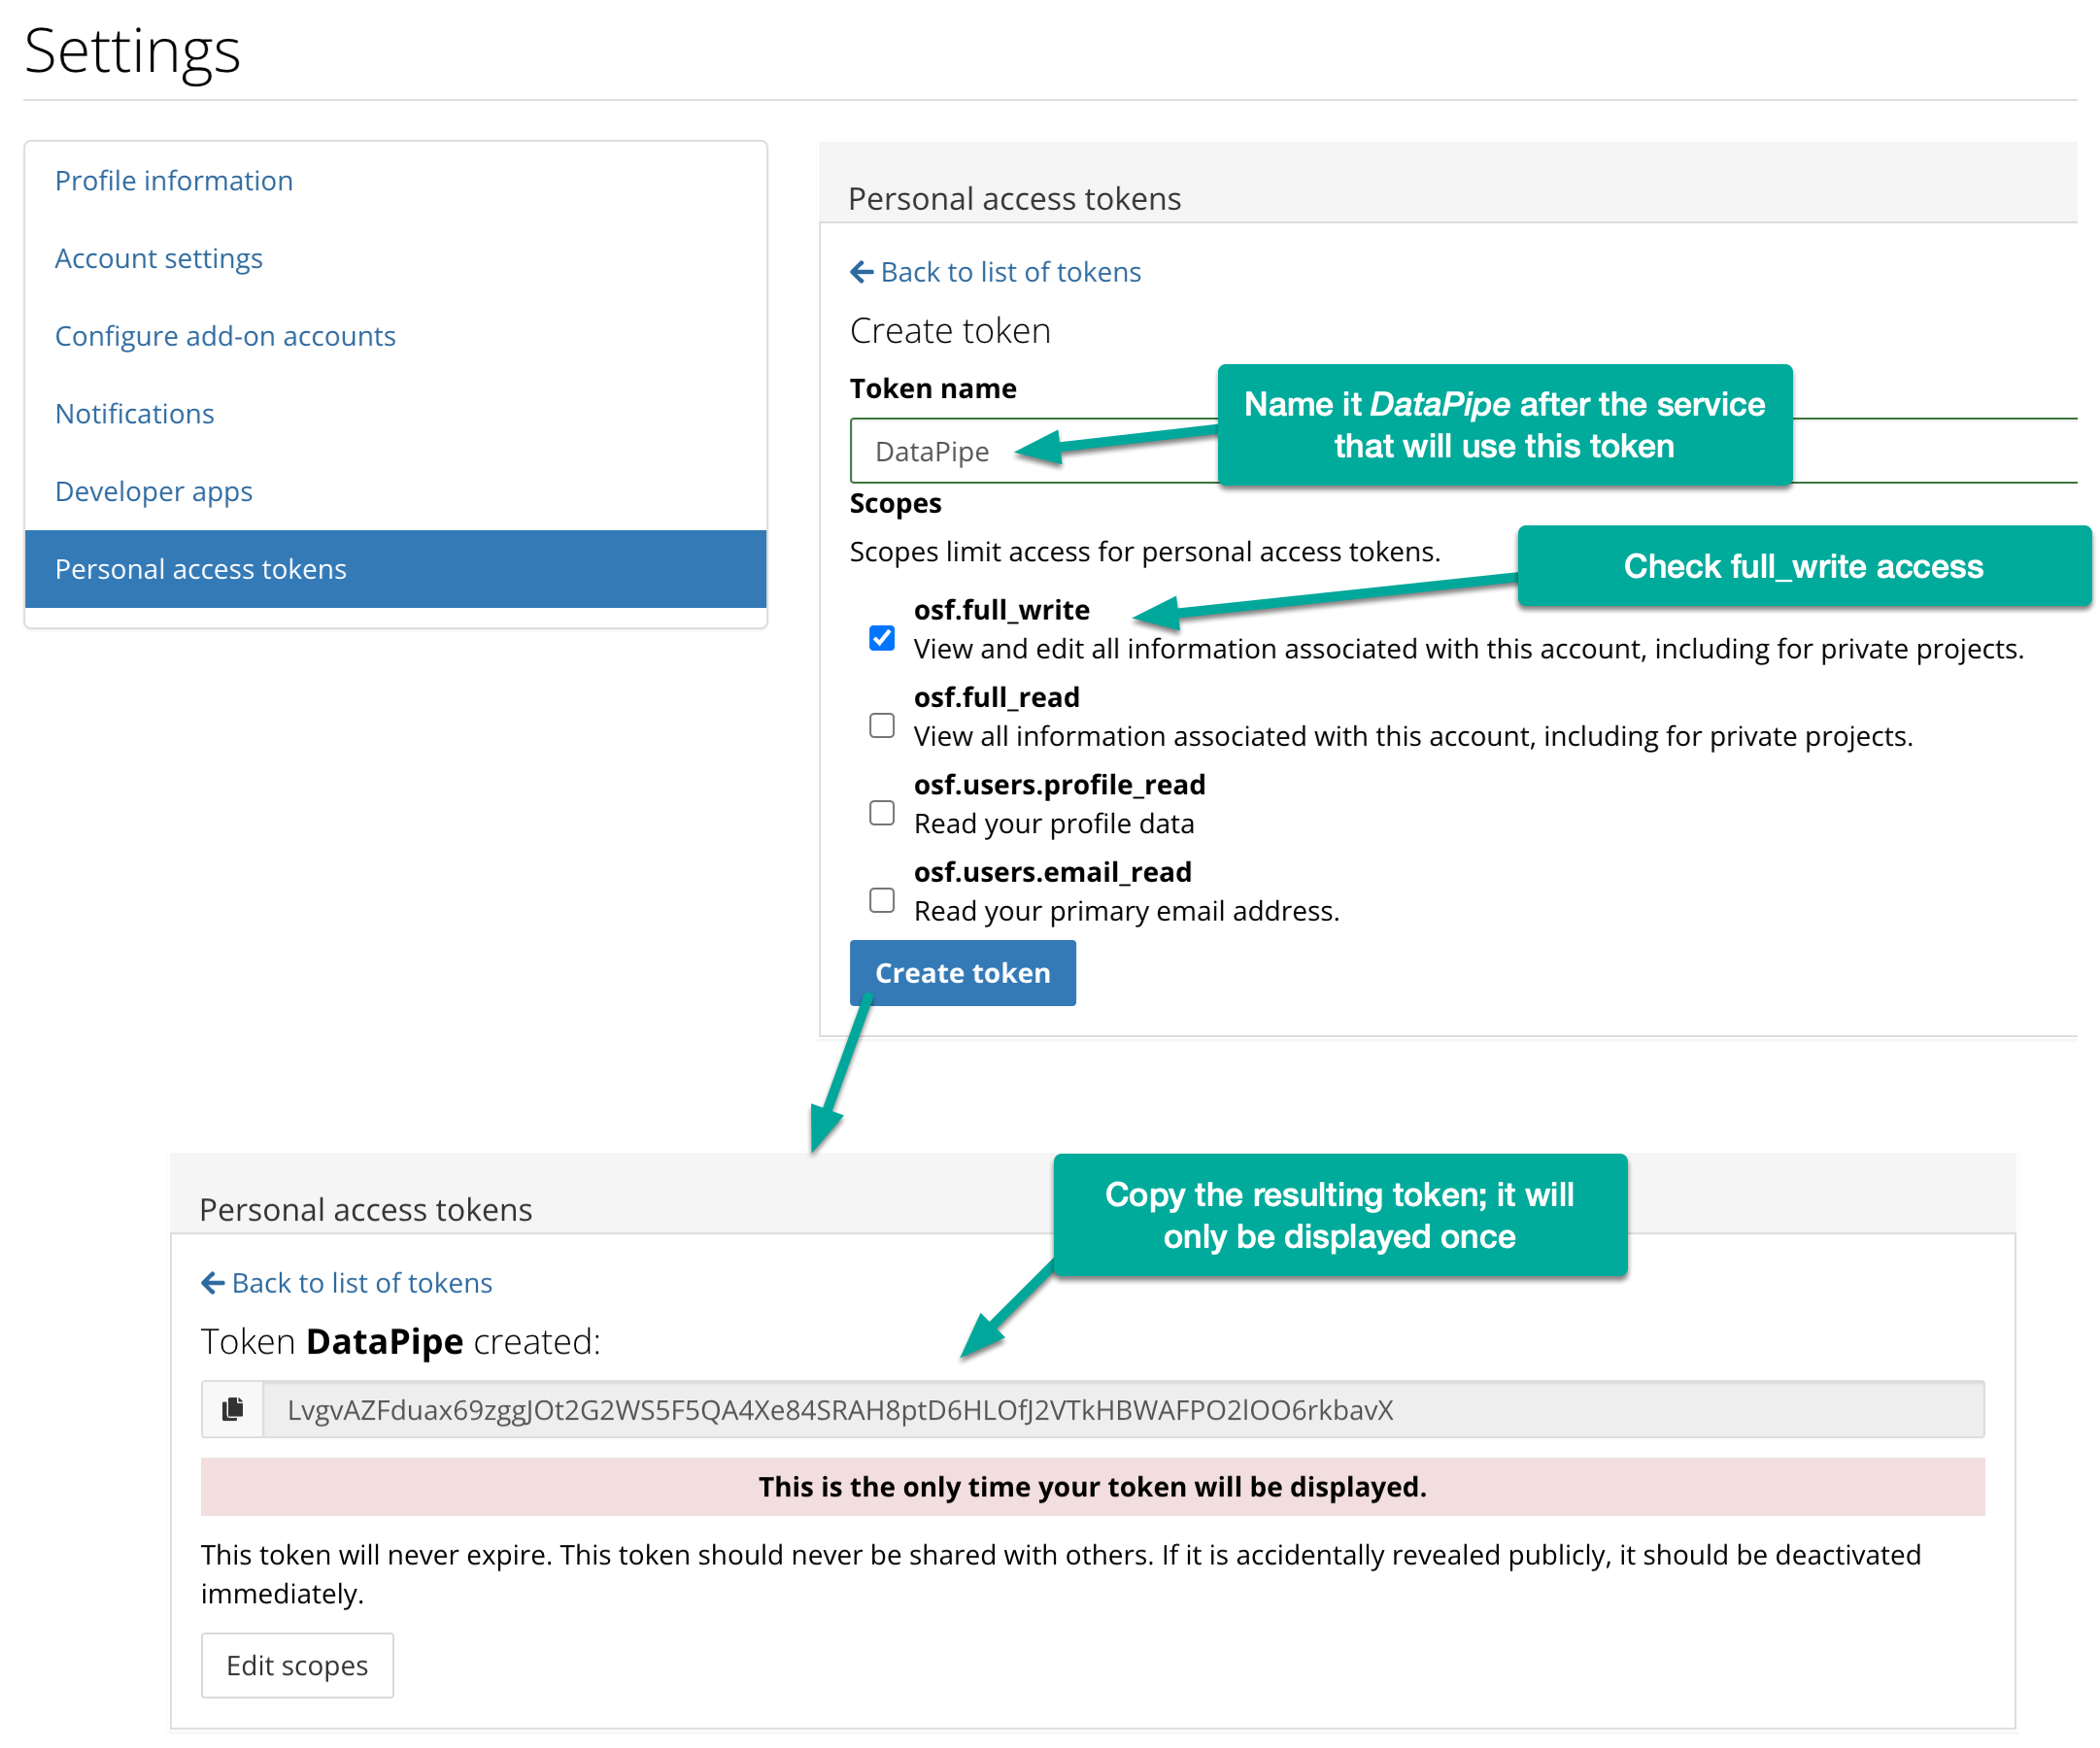
Copy the resulting token and use it in the following step...
Create DataPipe account and set OSF access token
Create a new DataPipe account at https://pipe.jspsych.org.
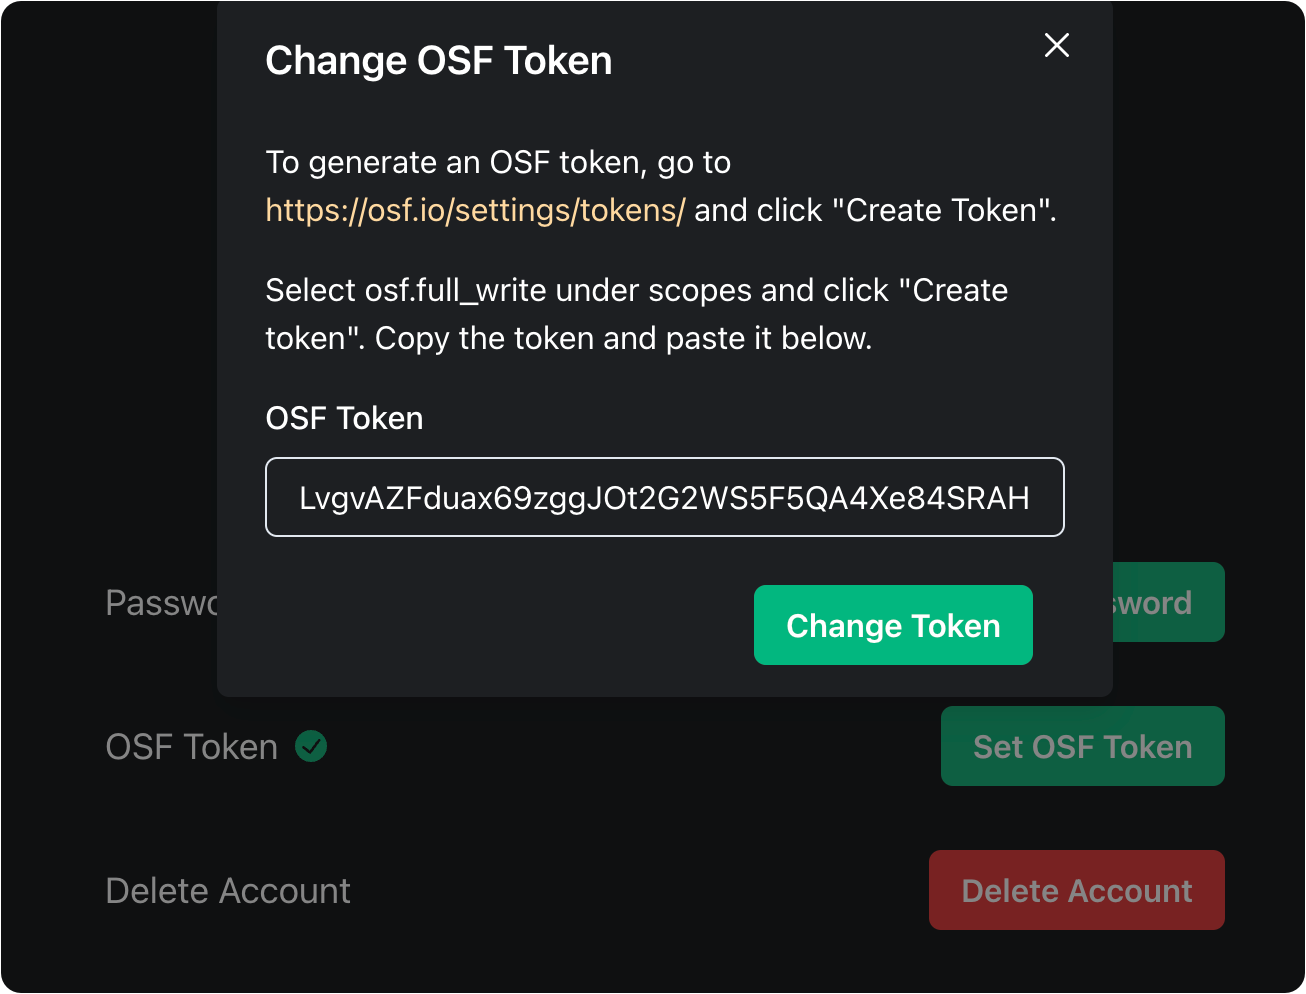
Once logged in under Account > Settings (https://pipe.jspsych.org/admin/account) click Set OSF Token and paste in the token generated in the previous step.
New OSF Project
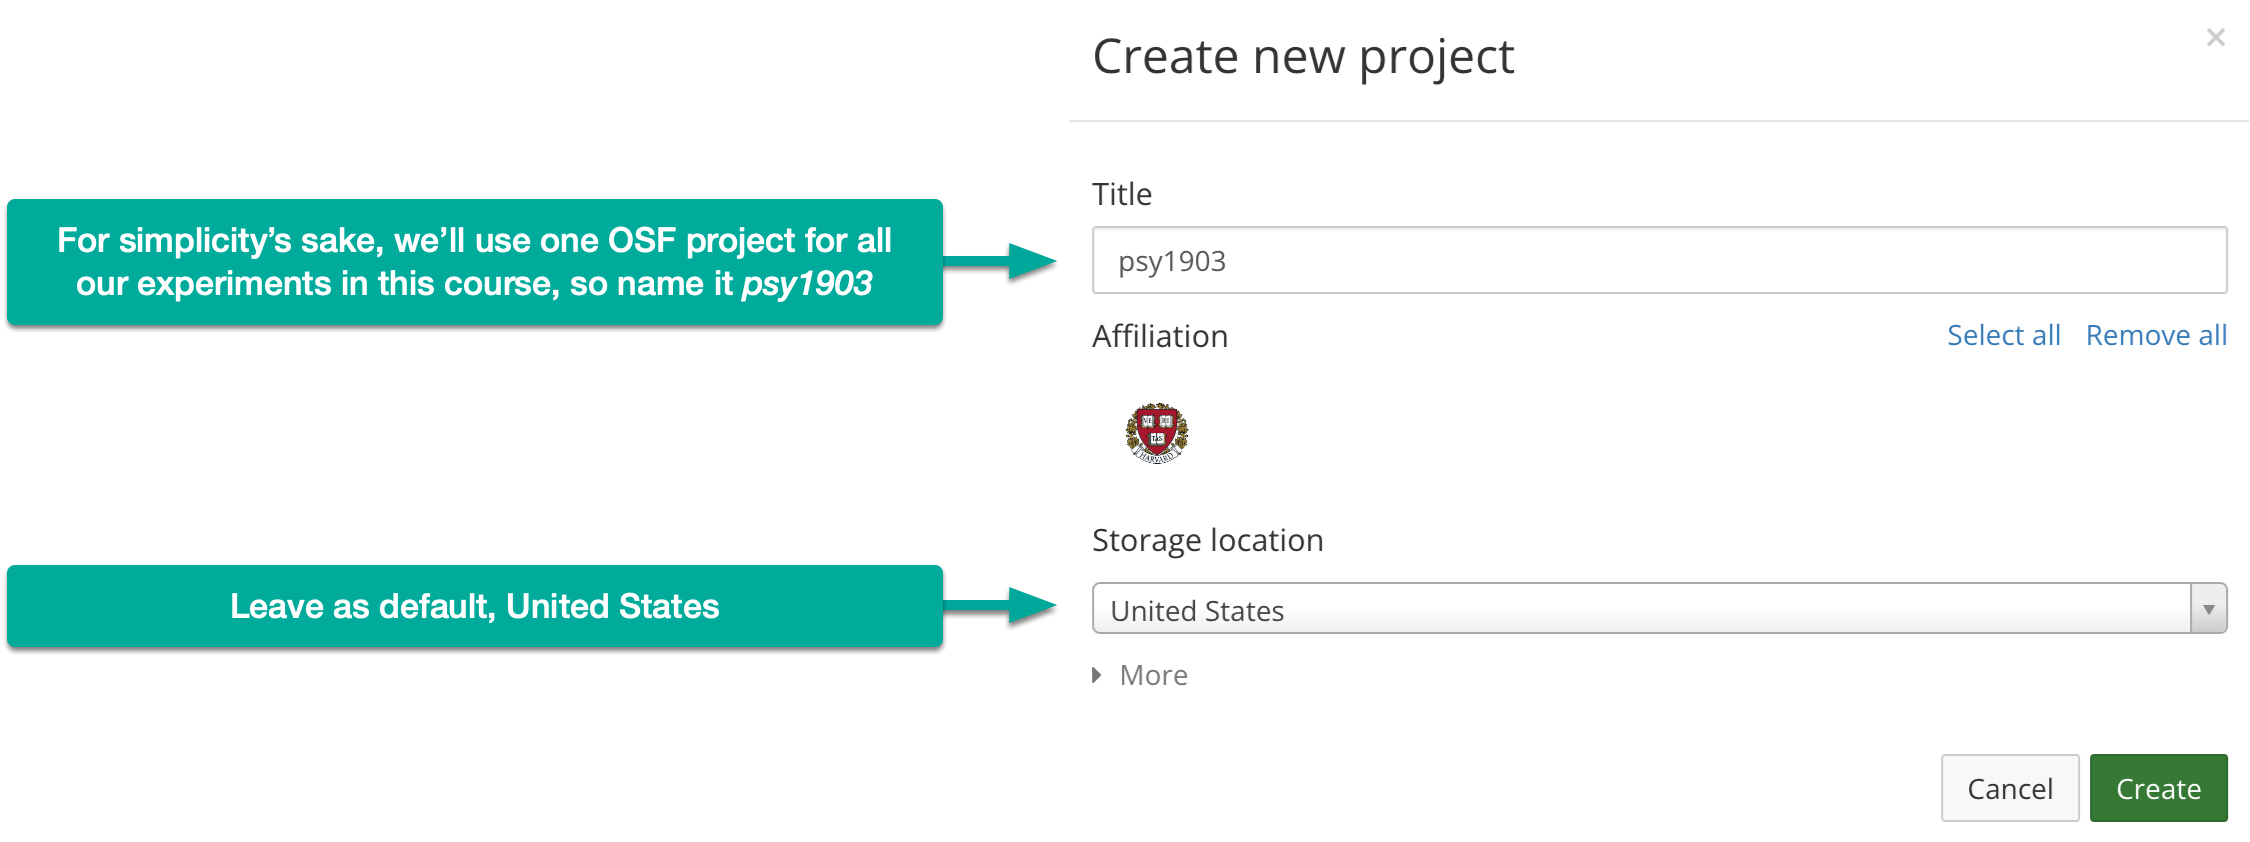
Returning to your account on OSF, click the Create new project button and fill in the details as follows:
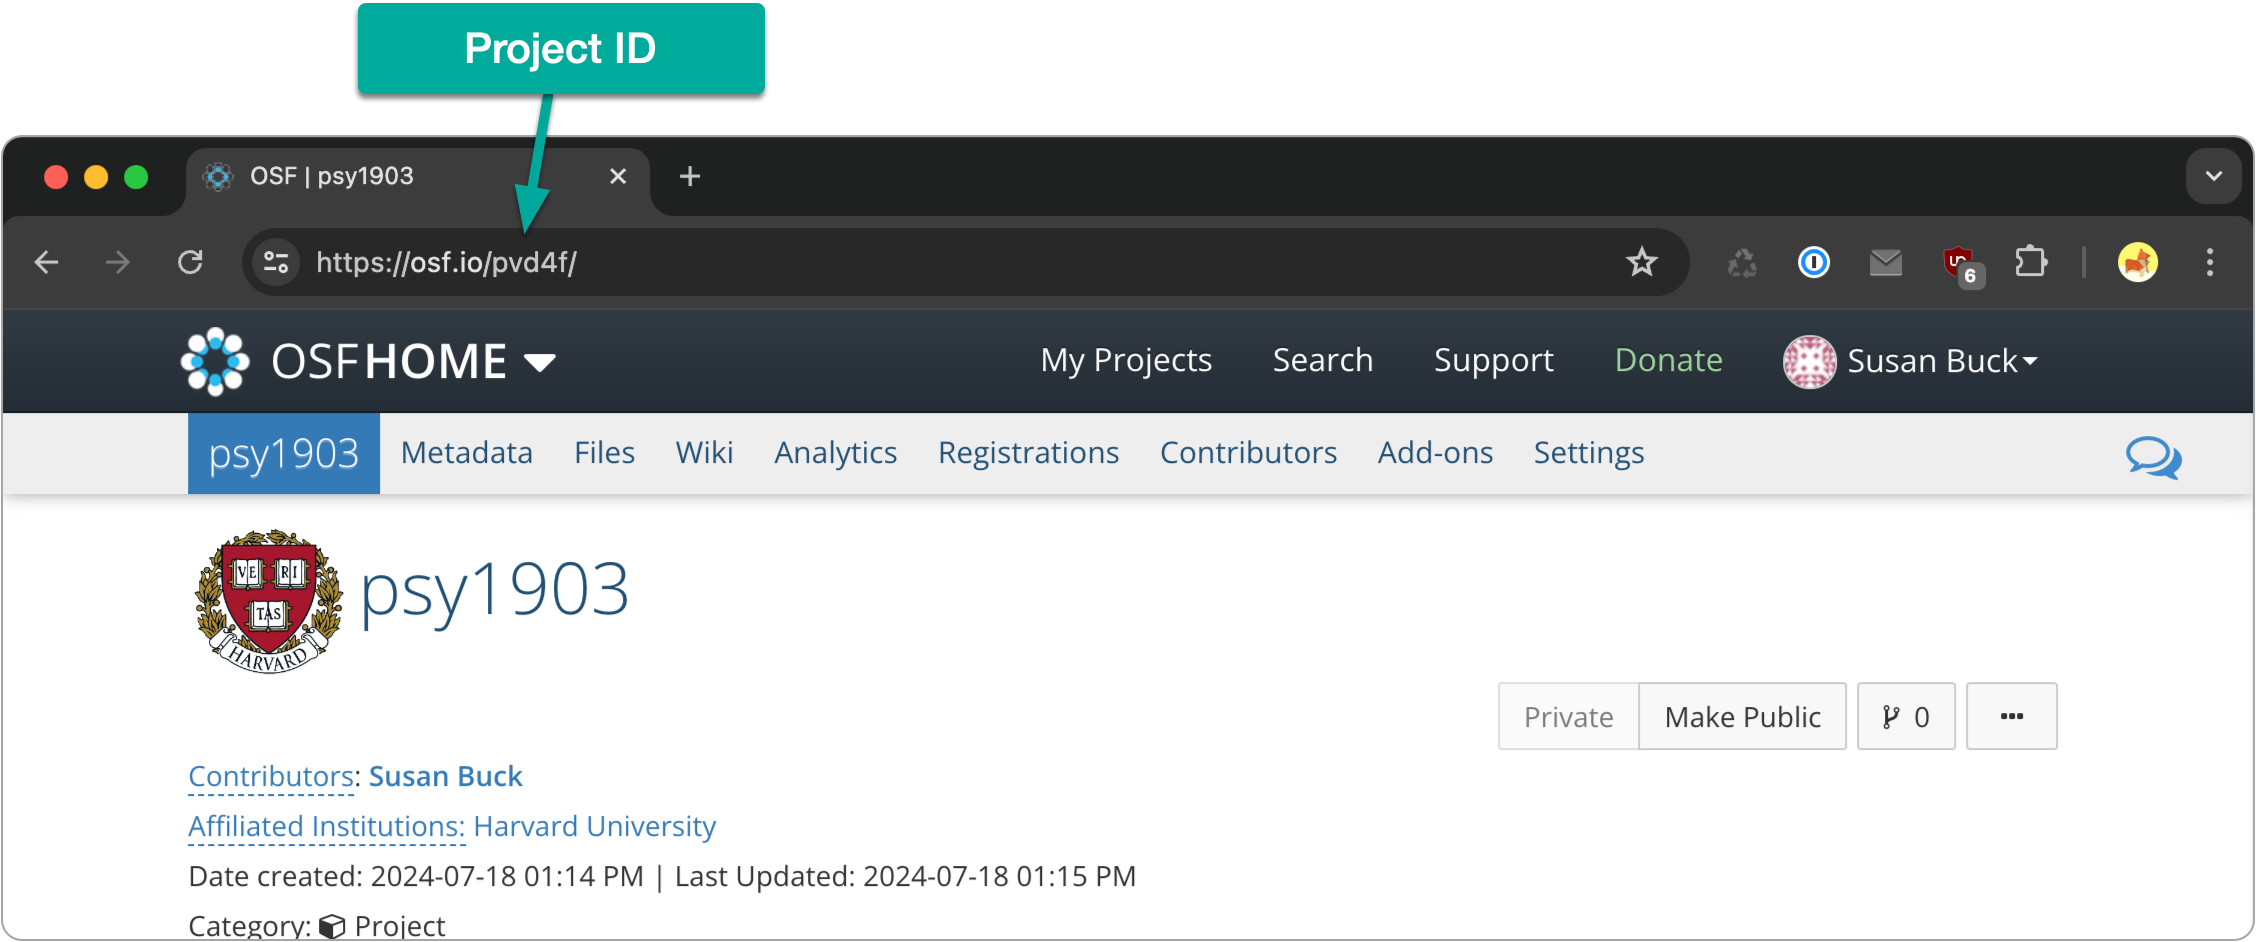
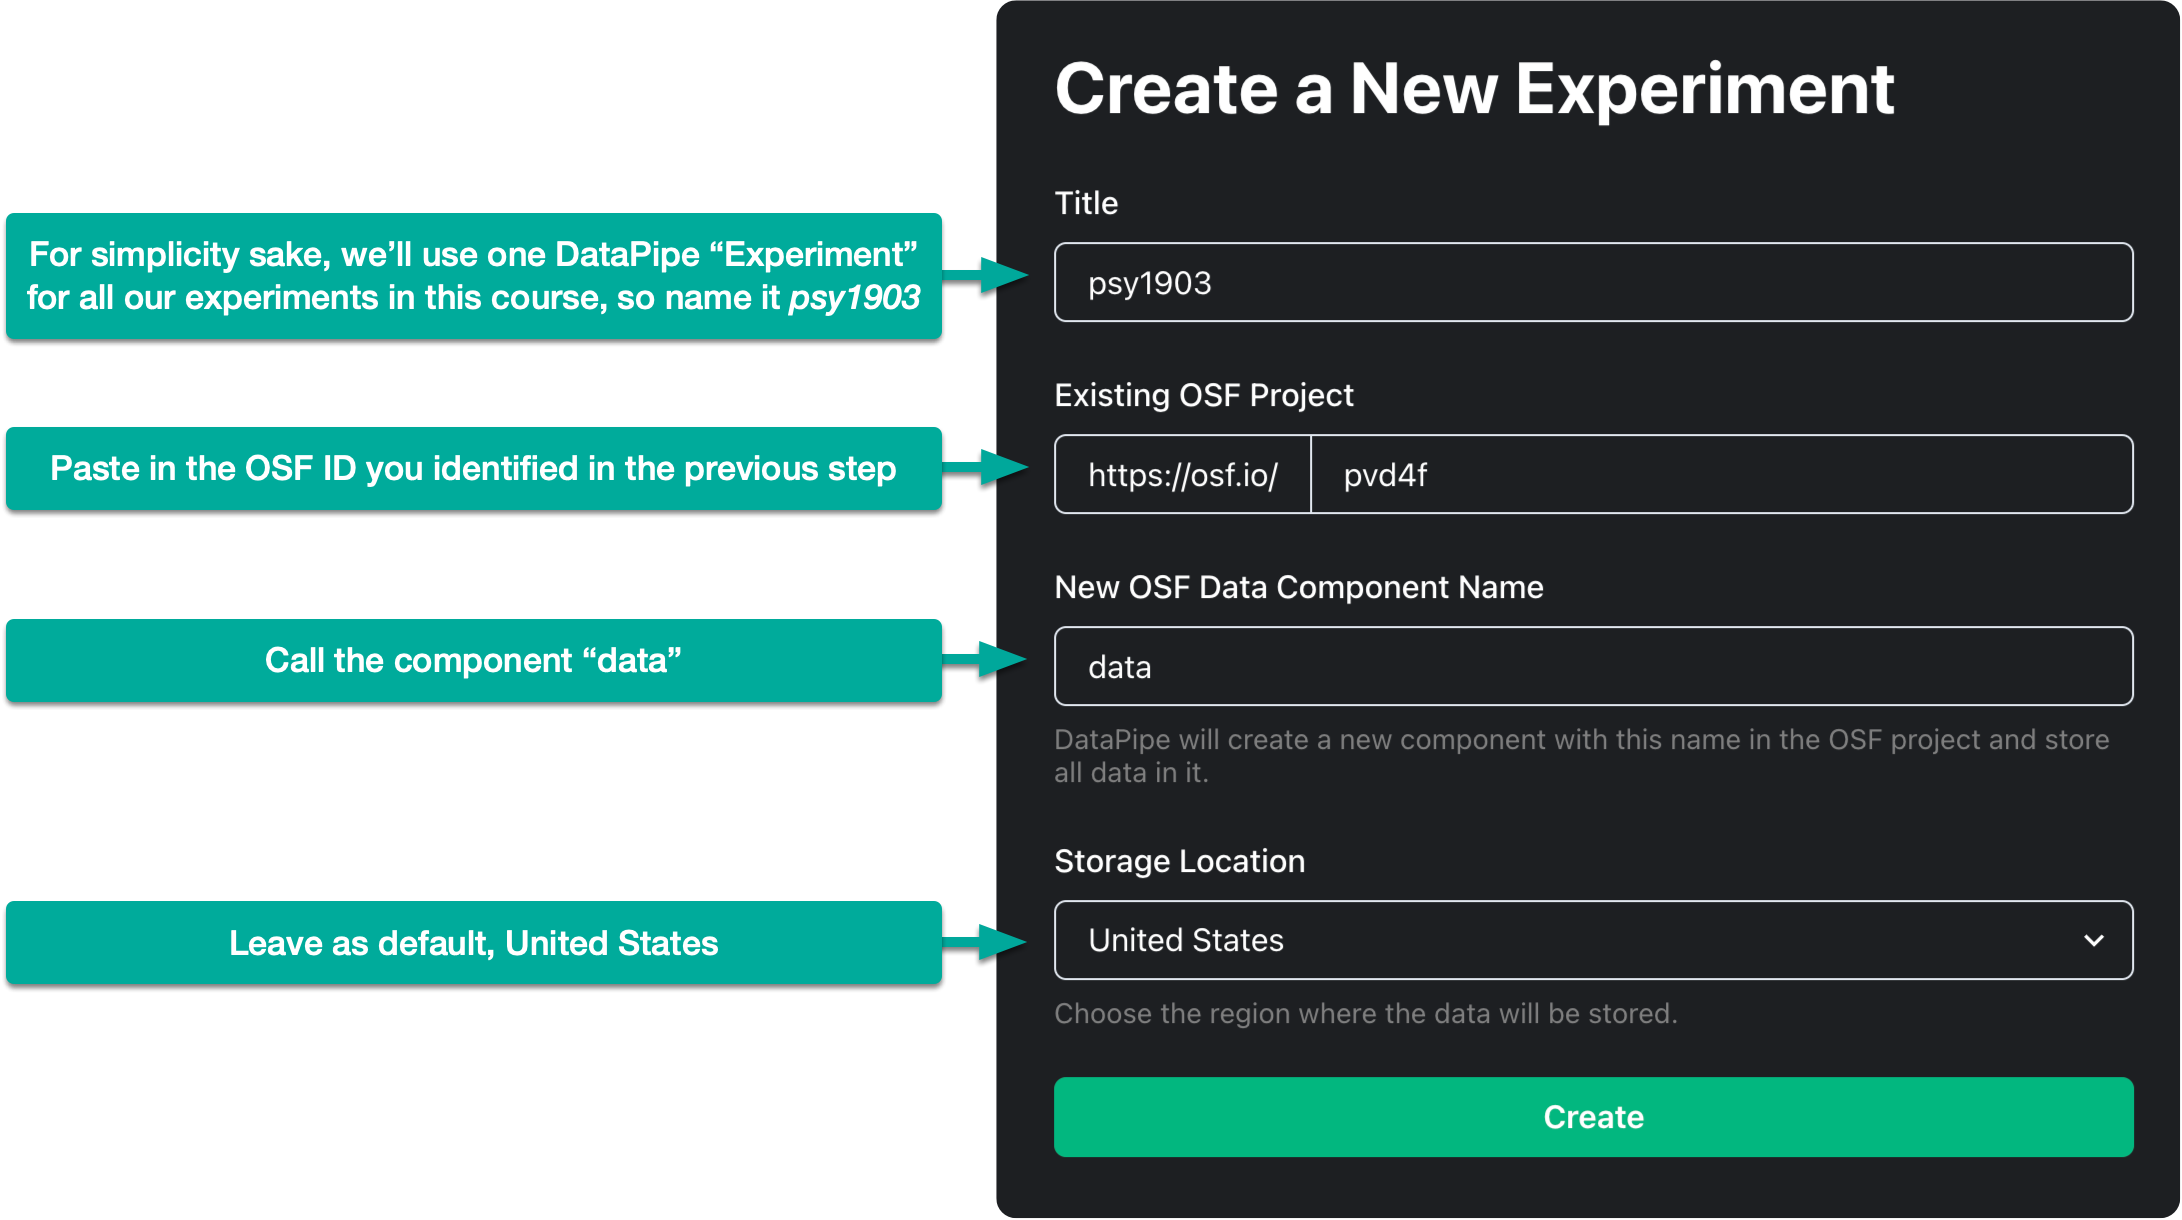
Once your project is created, copy/note the project ID which can be found in the URL. E.g. if the URL for your project is https://osf.io/pvd4f/, the project ID is pvd4f.
New DataPipe experiment
Returning to your account on https://pipe.jspsych.org click the green Create New Experiment button and fill in the details as follows:
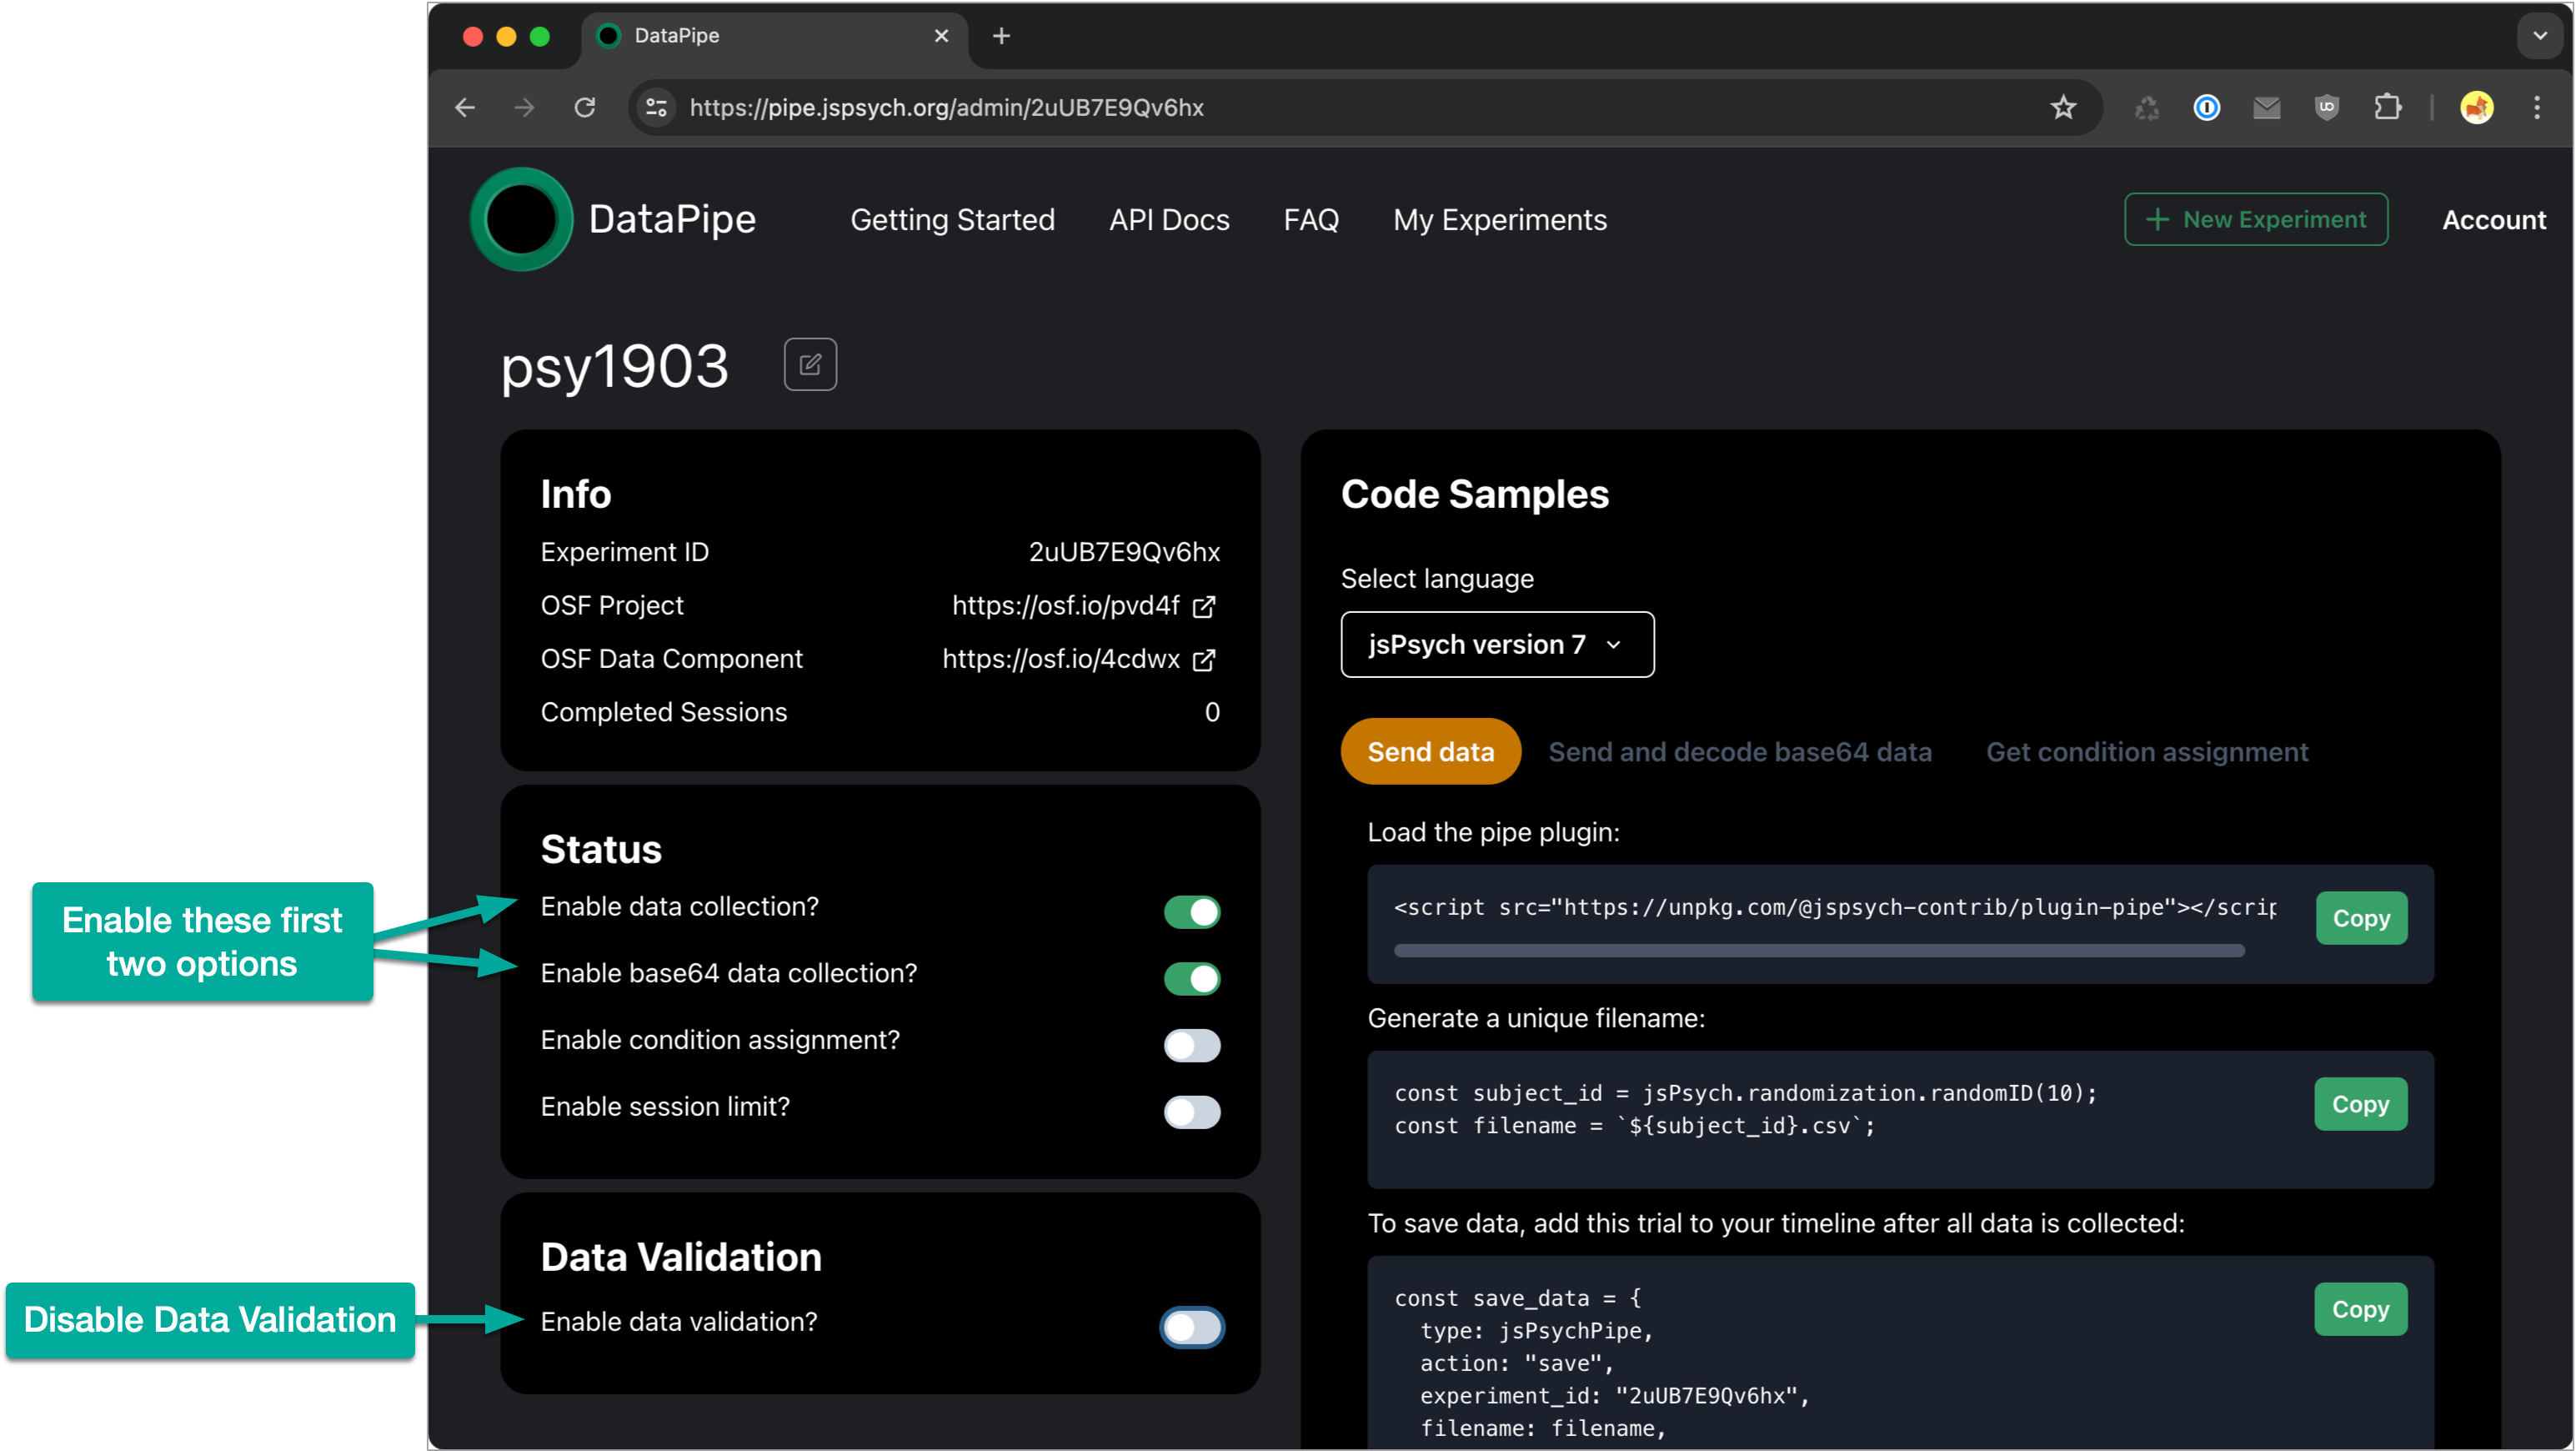
Once the experiment is created, enable data collection and base64 data collection. Disable Data Validation.
Update code with DataPipe experiment id
In the on_start method of your saveResultsTrial, update the dataPipeExperimentId variable with the your DataPipe experiment id which can be seen from the experiment dashboard.
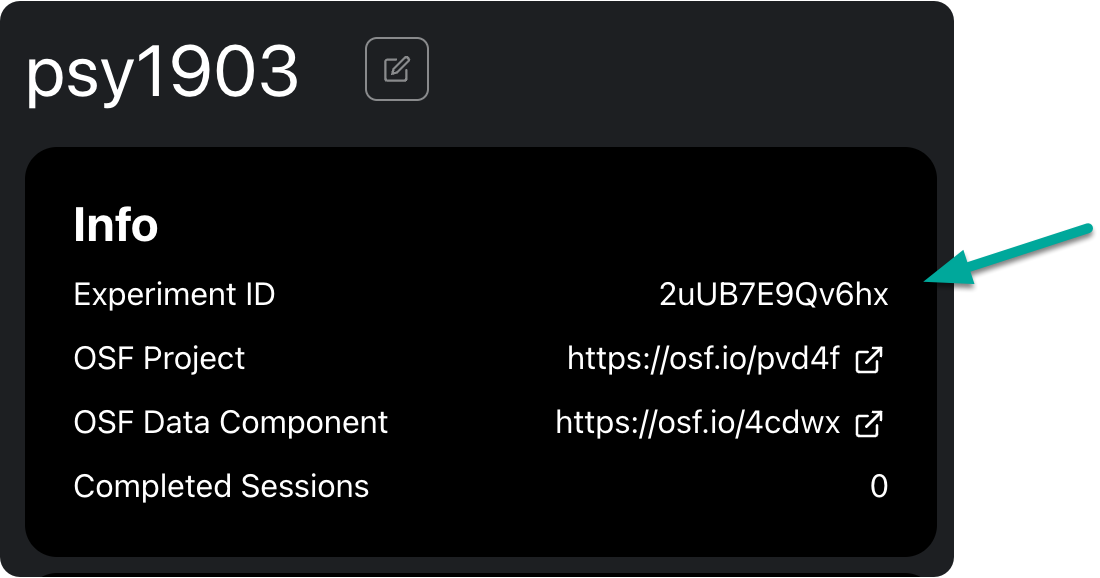
let dataPipeExperimentId = 'your-experiment-id-here';
Also update forceOSFSave setting it to true:
let forceOSFSave = true;
By default, our save code is set to save results locally if we’re running our experiment via our localhost URLs. Toggling forceOSFSave to true will force it to save to OSF even when we’re working locally. This allows us to test that our OSF setup is working as expected.
Run through your experiment again. Note that the screen should pause for a few seconds on the “Please wait” message while the data is being sent to the OSF servers behind the scenes.
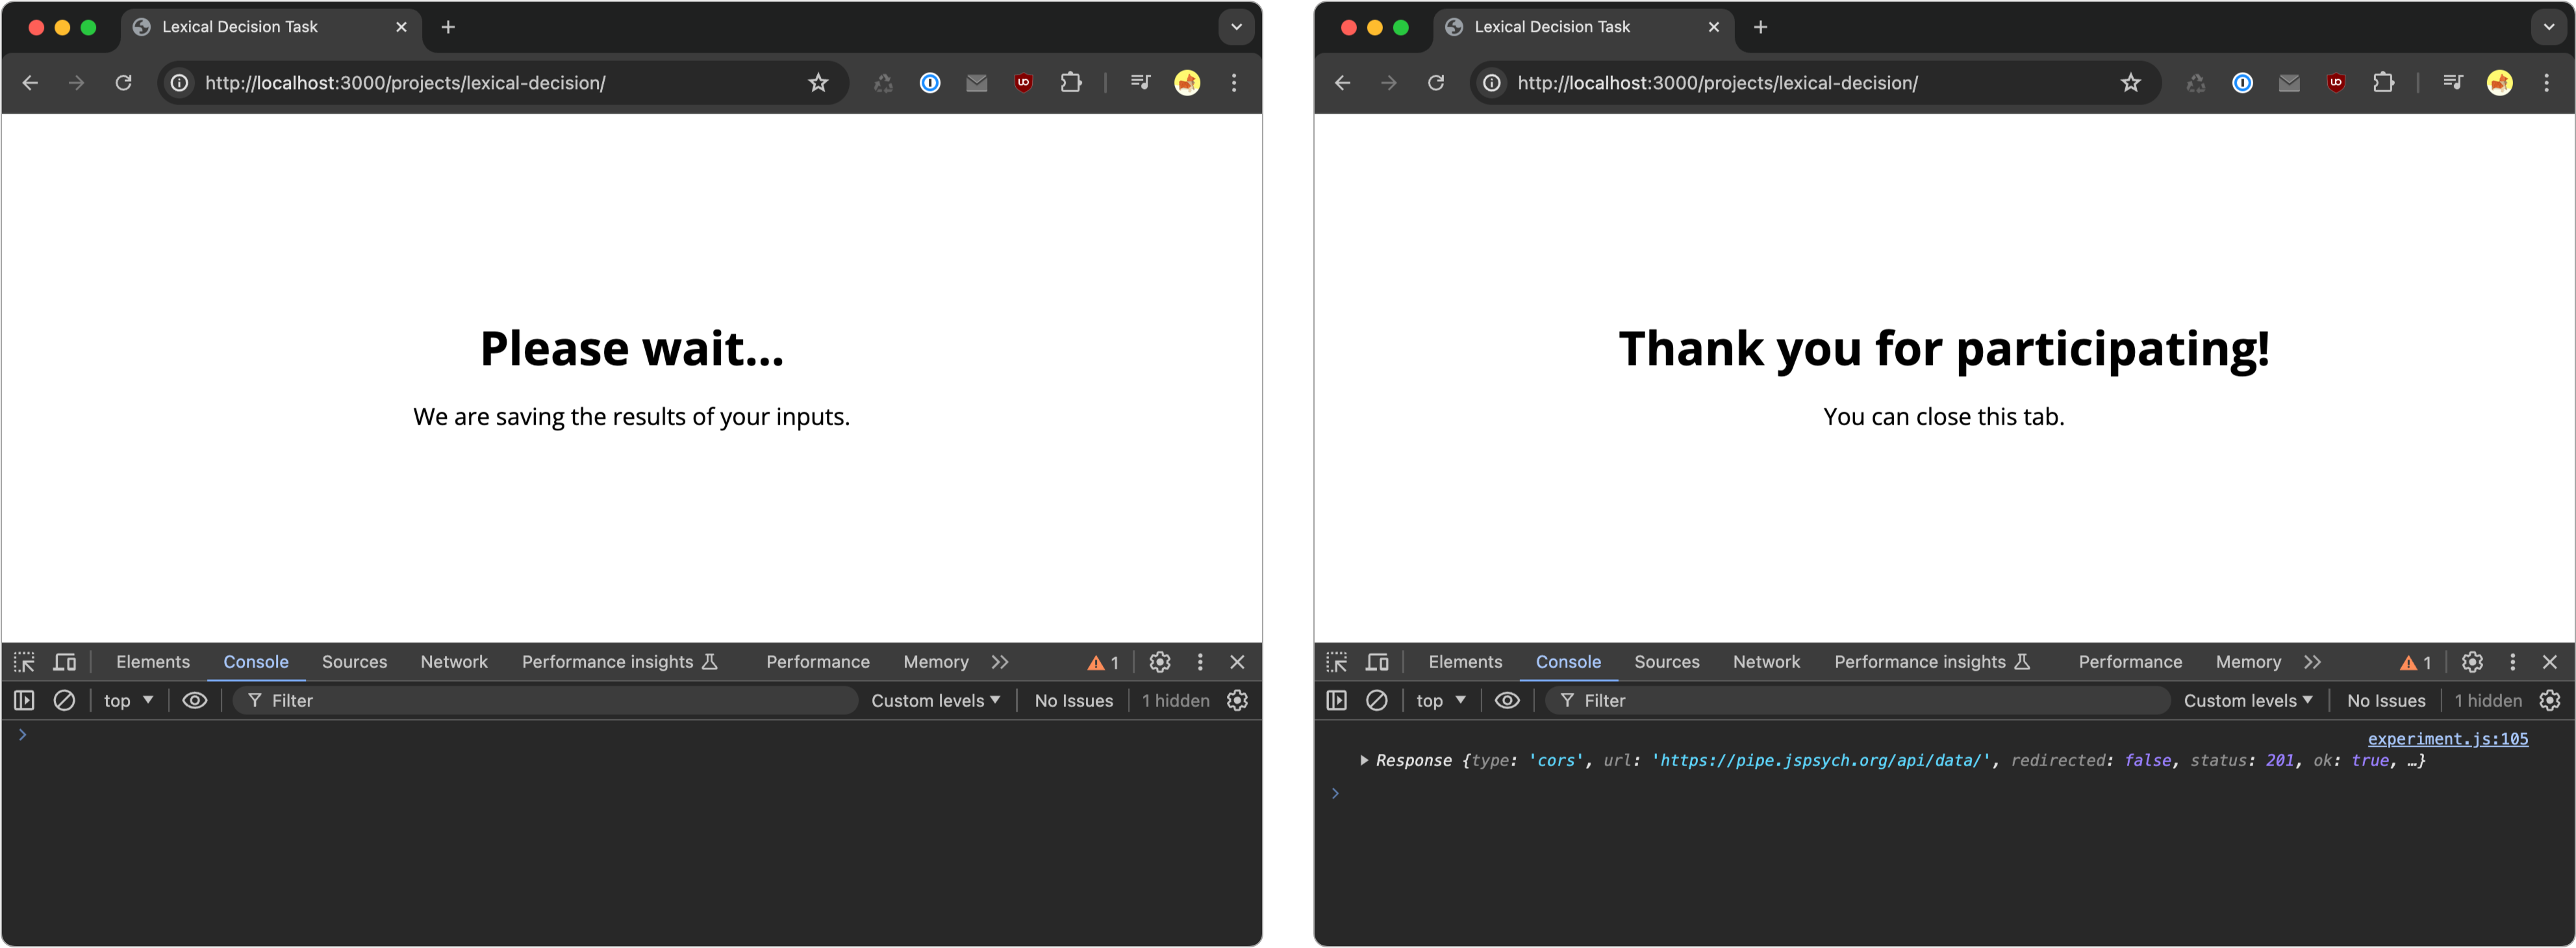
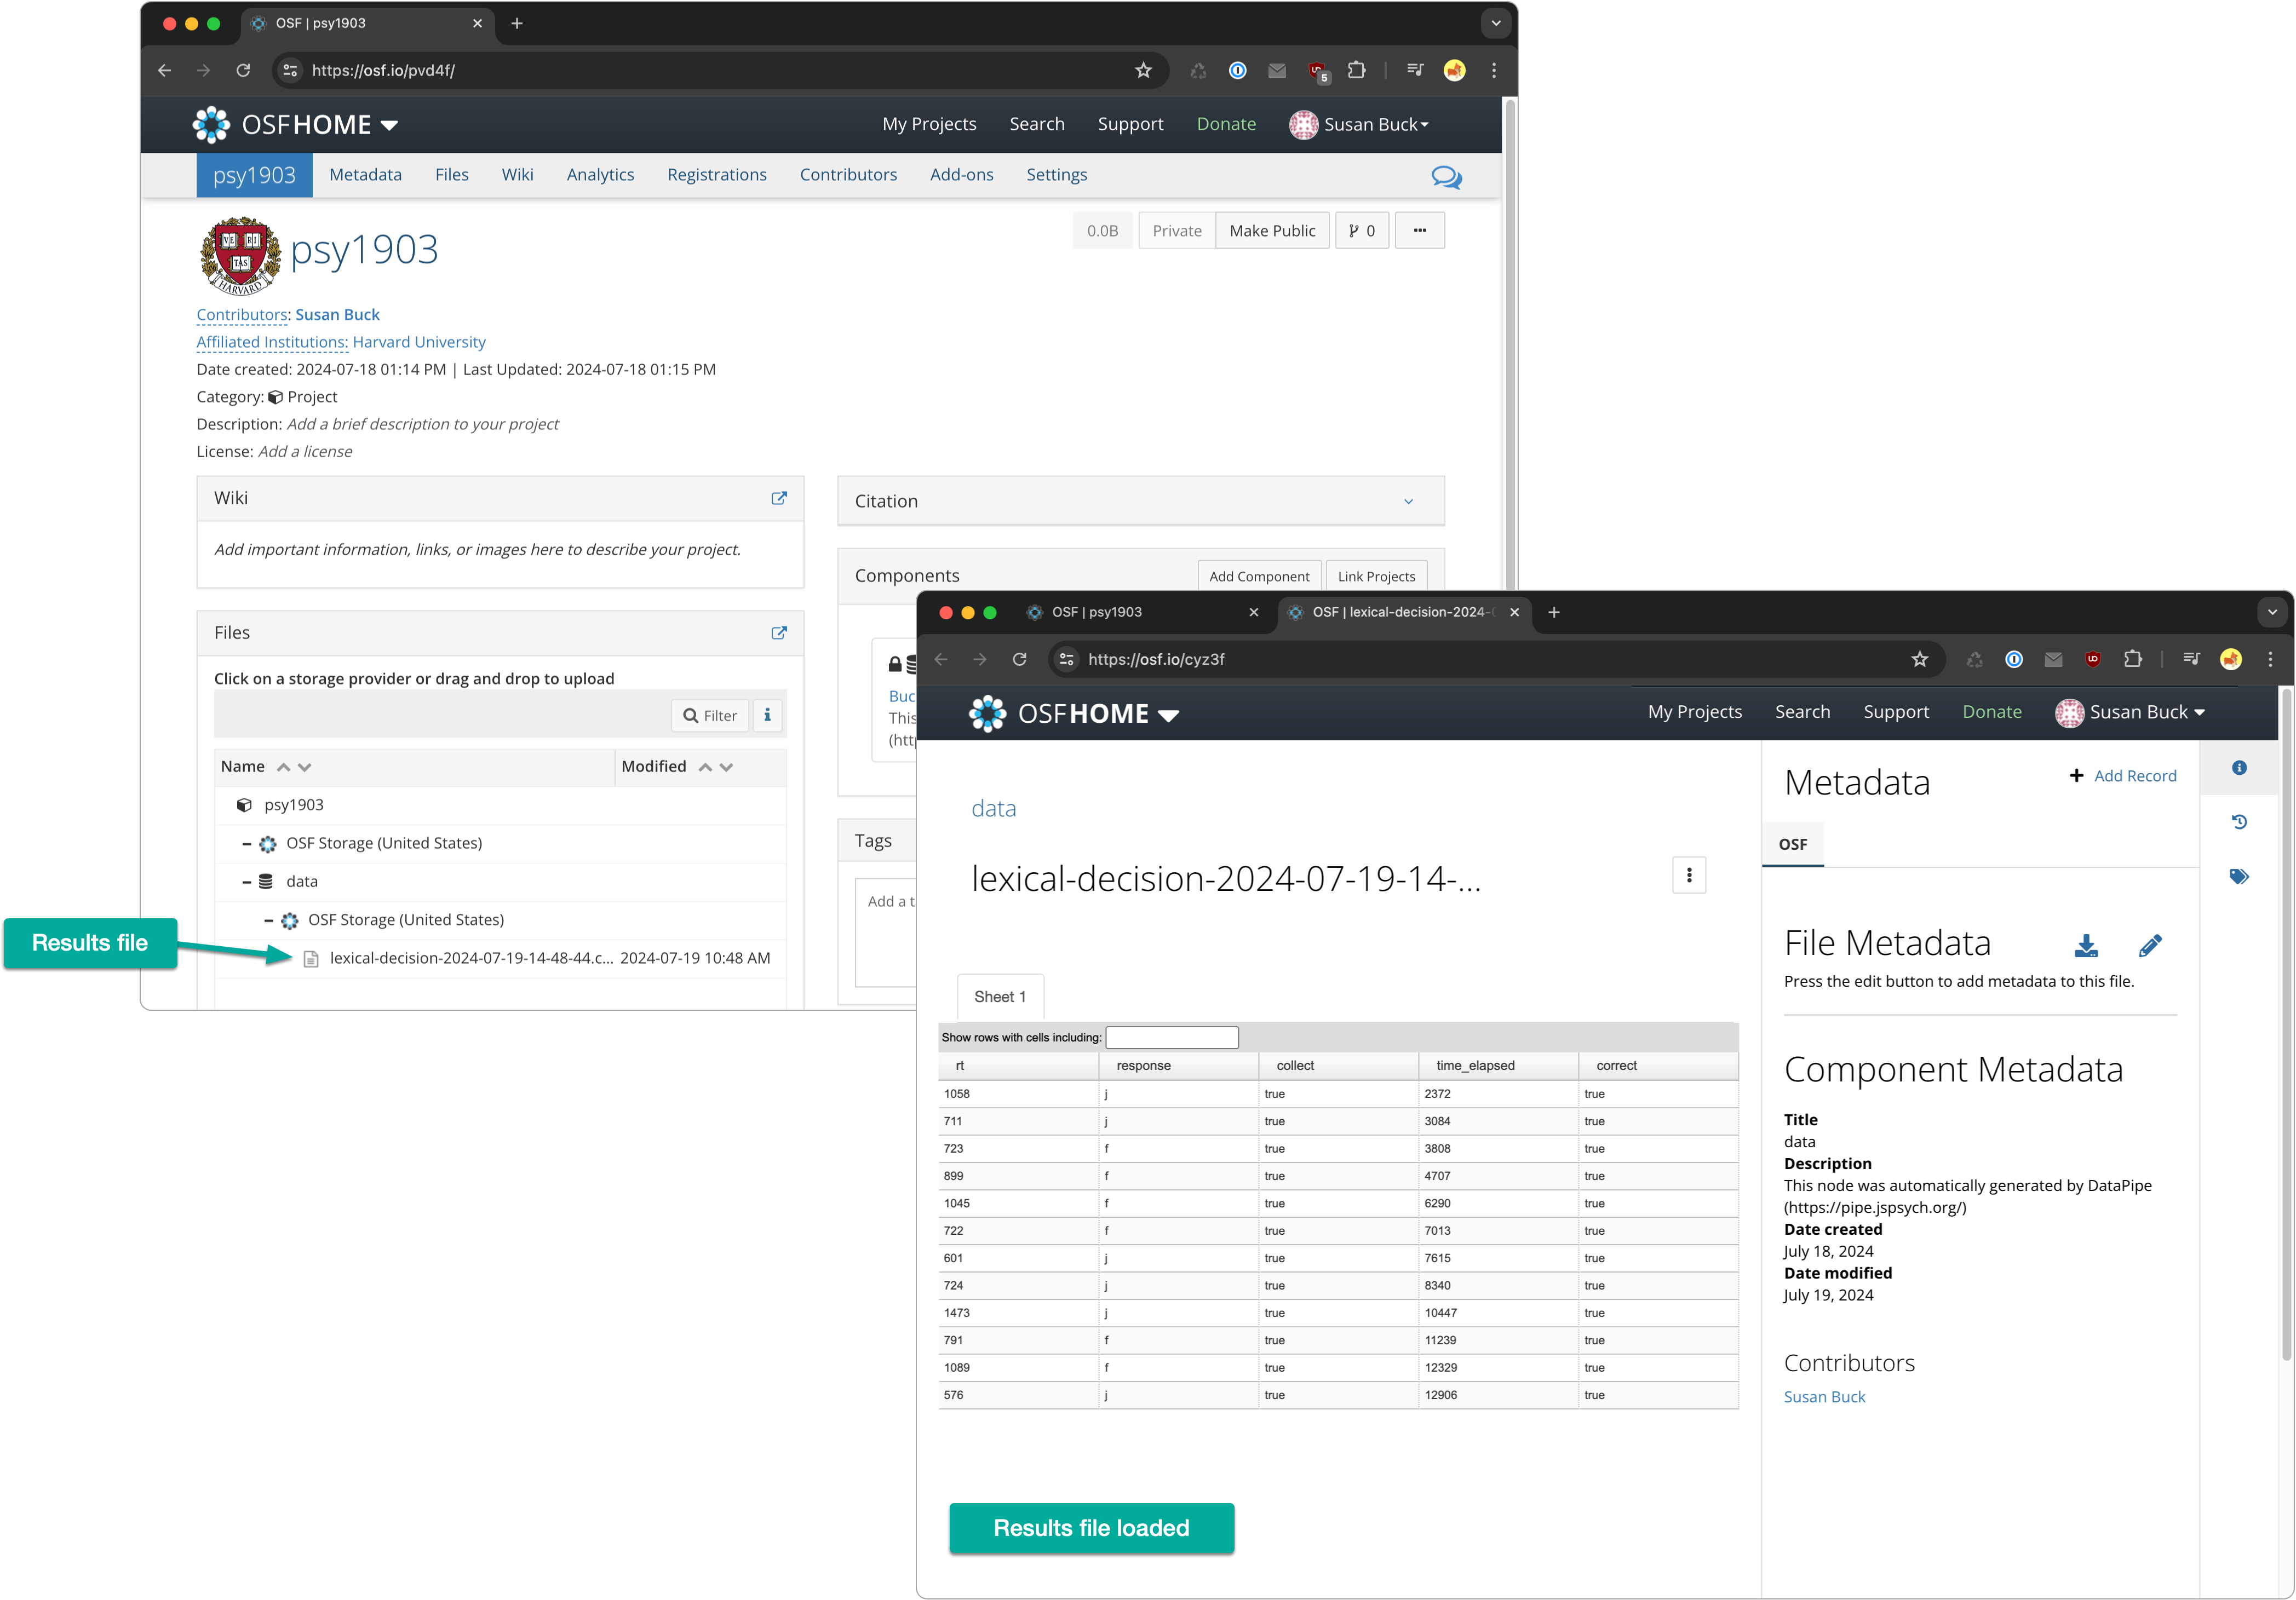
When done, you should be able to find your experiment results in the Files section of your OSF project’s dashboard. Clicking any of the results files will load the data.
After confirming your results are successfully saving to OSF, you can toggle forceOSFSave back to false so any future results generated locally are saved locally.