Introduction to R and RStudio
R is a free, open-source statistical programming language, widely used in academia, research, and industry. It is a powerful tool for data analysis, data visualization, and statistical modeling.
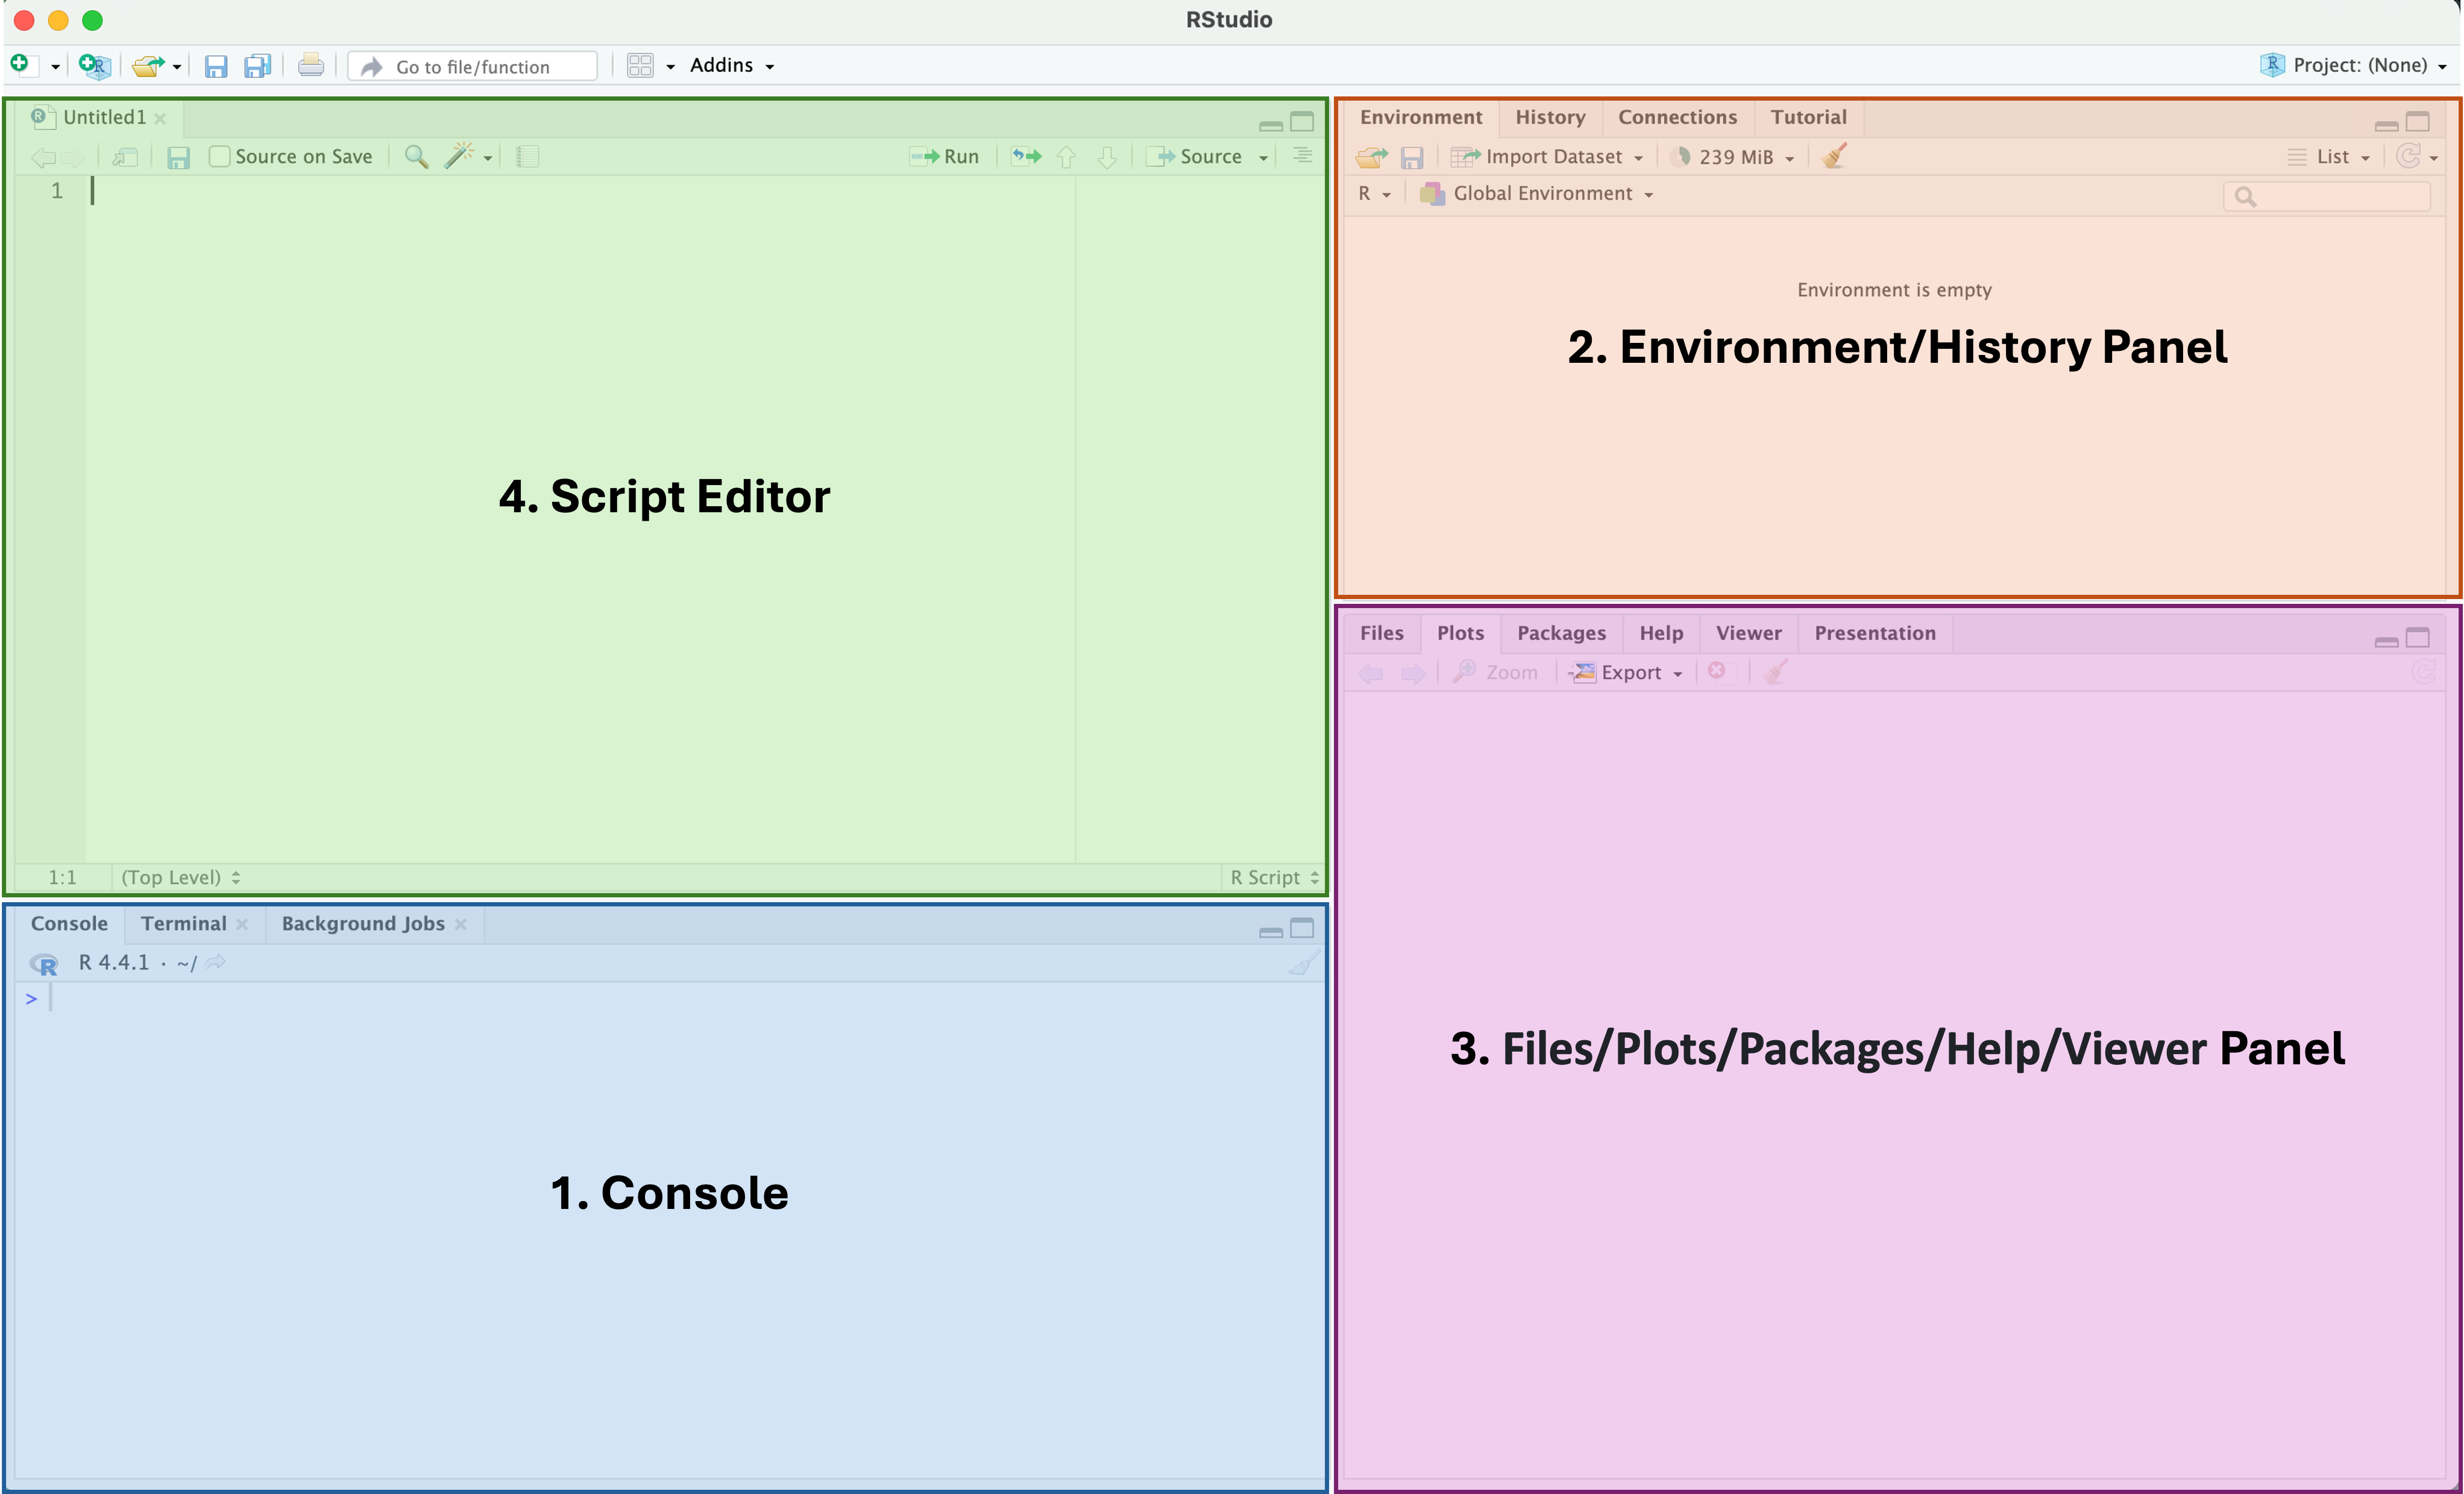
RStudio is a free integrated development environment (IDE) for R that makes it easier to work with R by organizing files, scripts, output, and plots. RStudio provides a graphical user interface (GUI) for R so that users are not restricted to the console.
Key Panels of RStudio

1. Console
Purpose: The Console is where commands are executed immediately. Any code entered here runs instantly, and the output appears below the command. Code run via the Script Editor will also output in the console.
When to Use: Ideal for testing quick commands, running single lines of code, or checking calculations without saving them to a script.
Key Points:
- The Console is interactive but does not save your code. Once you close RStudio, anything in the Console is lost unless it’s copied elsewhere.
- You can recall previous commands by pressing the up and down arrow keys.
- Error messages and warnings also appear here, helping you troubleshoot issues.
2. Environment/History Panel
Environment Tab:
Purpose: Shows all active objects in the current R session, including variables, data frames, functions, and any other stored data. These are the only objects R has access to at any given point in time.
Key Points:
- Overview of the structure and contents of loaded datasets, variables, and functions.
- Clicking on an object’s name in the Environment tab opens it in a viewer, making it easy to inspect large datasets.
- You can clear one object with the rm(objectName) function
- You can clear the whole environment (all stored objects) by using the command rm(list = ls()) in the console or by clicking “Clear” in the Environment tab.
- This is typically only done to start a completely new project OR to test if your script is correctly loading and assigning all expected objects (datasets, variables, functions, etc.)
History Tab:
Purpose: Keeps a record of every command entered, making it easy to track what’s been done in the session.
Key Points:
- You can review past commands and even select and rerun commands directly from the History tab.
- Commands in the History tab can be copied into a script to save them permanently (for instance if you were testing lines of code in the console but now want to save the correct version into your script).
3. Files/Plots/Packages/Help/Viewer Panel
Files Tab:
Purpose: Works like a file explorer, showing all files in your working directory.
Key Points:
- Students can navigate to different folders, open files, and set the working directory here.
- The working directory is where R looks for files by default. Students should set it to the folder where their data files are saved.
Plots Tab:
Purpose: Displays any plots created by R code.
Key Points:
- Students can view, zoom in, and export plots from here.
- The tab keeps a history of plots created during the session, allowing students to revisit previous visualizations.
Packages Tab:
Purpose: Lists all installed packages and provides an easy way to load or install new ones.
Key Points:
- Students can see which packages are installed and load them by checking the boxes next to package names.
- The “Install” button allows students to search for and install new packages directly from RStudio.
Help Tab:
Purpose: Provides documentation and help files for functions, packages, and R in general.
Key Points:
- Students can access help on any function by typing the function name in the Help search bar or using ?function_name in the Console.
- R’s help files include examples, making this tab a valuable resource for learning new commands.
Viewer Tab:
Purpose: Used to display web content, HTML files, and interactive visualizations created by packages like shiny.
Key Points:
- This tab is less frequently used in basic R analysis, but it can be helpful when exploring more advanced features later.
4. Script Editor
Purpose: The Script Editor is where you can write, edit, and save code.
When to Use: Ideal for writing and organizing longer code, which you want to save and run multiple times.
Key Points:
- To create a new script, students can go to File > New File > R Script. This opens a blank script editor where they can write multiple lines of code.
- Code in the Script Editor can be run line-by-line or in chunks by highlighting the code and clicking “Run” (or pressing Ctrl + Enter on Windows, Cmd + Enter on Mac).
- Scripts can be saved as .R files, making it easy to re-run analyses without retyping everything.