Suggestion Box
Spot an error or have suggestions for improvement on these notes? Let us know!
Images, Fixations, and Timing
In this note set we will build a simple response time experiment that will give us experience with the following 3 techniques:
- Displaying images
- Displaying a fixation break between conditions
- Adjusting the timing of trials
Setup
Create a new directory /psy1903/web/response-time with the following files:
index.htmlconditions.jsexperiment.jsimages/
Within index.html, place this code:
<!DOCTYPE html>
<html>

<head>
    <title>Response Time Task</title>
    <link href=data:, rel=icon>

    <link href='https://unpkg.com/jspsych/css/jspsych.css' rel='stylesheet' type='text/css'>

    <script src='https://unpkg.com/jspsych'></script>
    <script src='https://unpkg.com/@jspsych/plugin-html-keyboard-response'></script>

    <script src='conditions.js'></script>
    <script src='experiment.js'></script>
</head>

<body></body>

</html>
Within conditions.js, place this code:
let colors = ['blue', 'orange'];

conditions = initJsPsych().randomization.repeat(colors, 5);

console.log(conditions);
Within experiment.js, place this code:
let jsPsych = initJsPsych();

let timeline = [];

let welcomeTrial = {
    type: jsPsychHtmlKeyboardResponse,
    stimulus: `
    <h1>Welcome to the Response Time Task!</h1>
    <p>In this experiment, you will see a blue or orange circle on the screen</p>
    <p>If you see a blue circle, press the F key.</p>
    <p>If you see a orange circle, press the J key.</p>
    <p>Press SPACE to begin.</p>
    `,
    choices: [' '],
};
timeline.push(welcomeTrial);


for (let condition of conditions) {
    let conditionTrial = {
        type: jsPsychHtmlKeyboardResponse,
        stimulus: `
            <img src='images/${condition}-circle.png'>
            `,
        data: {
            collect: true
        },
        choices: ['f', 'j'],
    };
    timeline.push(conditionTrial);

    let fixationTrial = {
        type: jsPsychHtmlKeyboardResponse,
        stimulus: `+`,
        trial_duration: 500, // 500 milliseconds = .5 seconds
        choices: ['NO KEY']
    }

    timeline.push(fixationTrial);
}

let debriefTrial = {
    type: jsPsychHtmlKeyboardResponse,
    stimulus: `
    <h1>Thank you for participating!</h1>
    <p>You can close this tab.</p>
    `,
    choices: 'NO_KEYS',
    on_start: function () {
        let data = jsPsych.data
            .get()
            .filter({ collect: true })
            .ignore(['stimulus', 'trial_type', 'plugin_version', 'collect'])
            .csv();
        console.log(data);
    }
};

timeline.push(debriefTrial);

jsPsych.run(timeline);
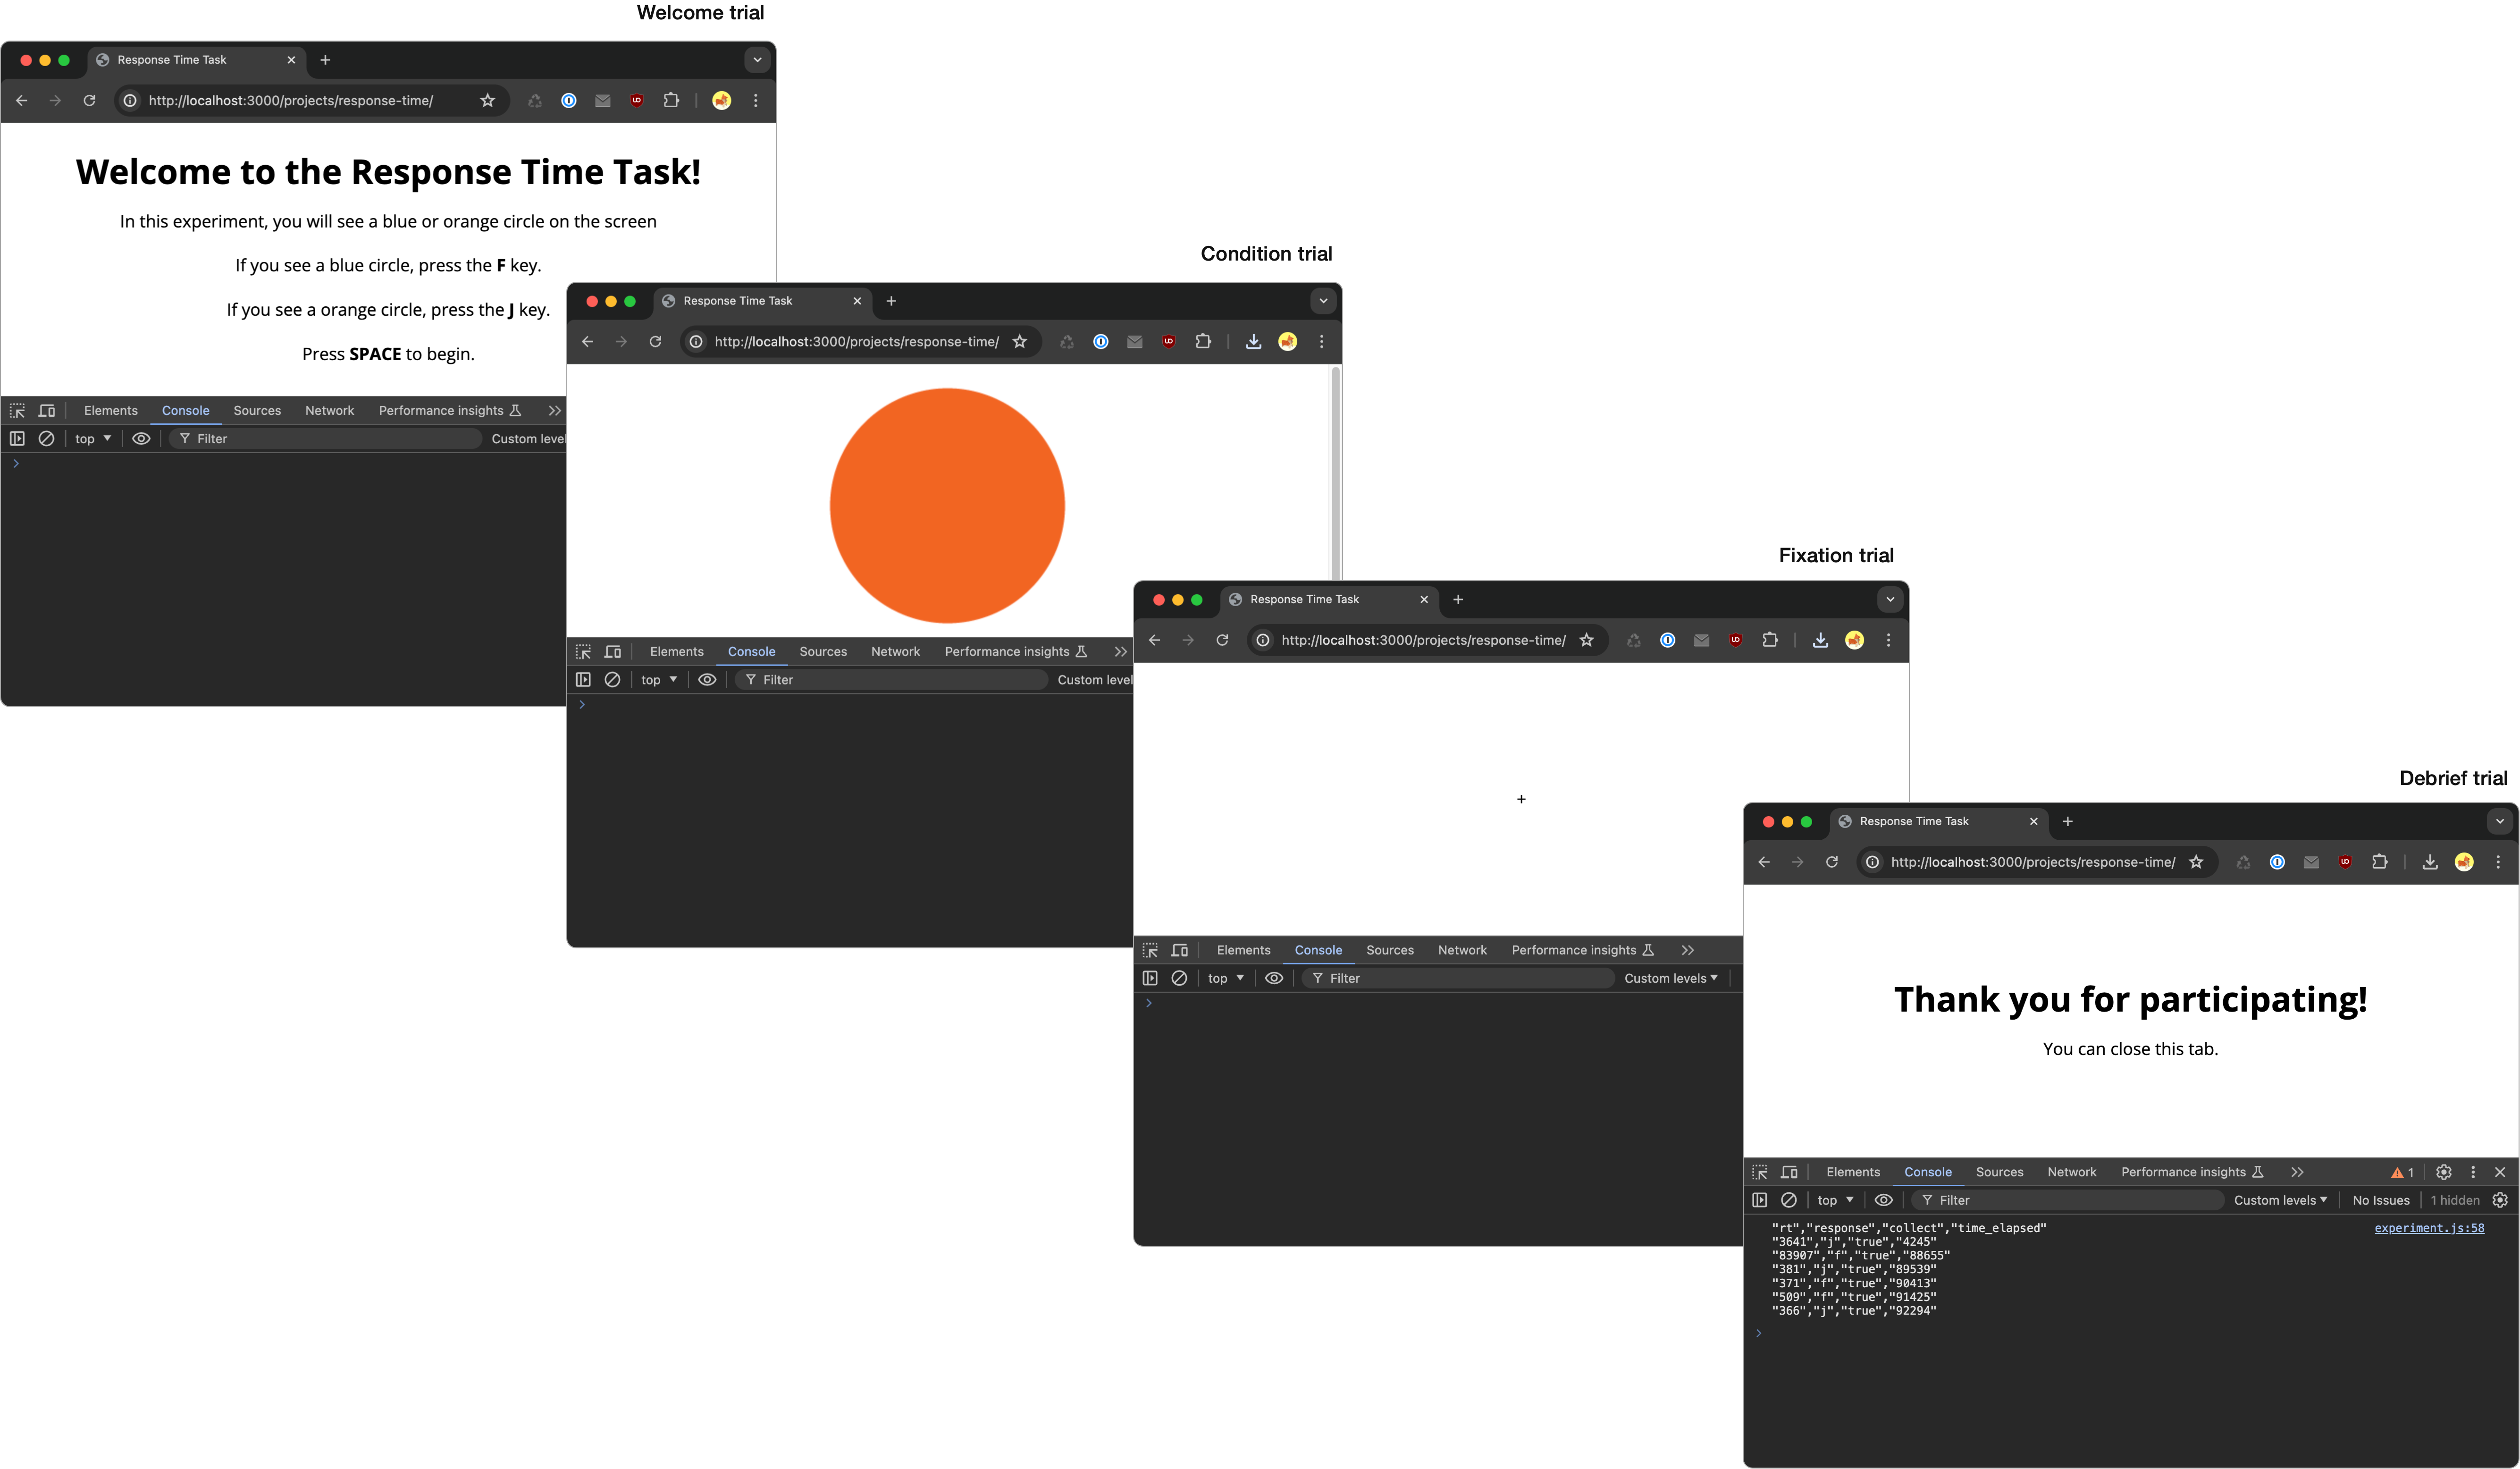
Here are some screenshots from the above experiment (click to enlarge):

Images
To display images, we used the html-keyboard-response plugin we’ve been using in all our examples so far. Within the stimulus property for this plugin, we simply embedded a HTML image element which follows this pattern:
<img src='/path/to/image.ext'>
Because we needed to dynamically choose our image based on the condition (either blue or orange), we used template strings to inject the color (blue or orange) into the file path for the image:
stimulus: `
    <img src='images/${condition}-circle.png'>
`,
Within jsPsych there is a image-keyboard-response plugin which also can also be used to display images.
If your experiment uses many image files, you can use the preload plugin to make sure these images are preloaded into the browser’s memory when the page loads. This way, there will be no delays for an image to load as the participant proceeds through the experiment. For experiments that are studying reaction time, preloading images is important.
Fixation breaks and trial timing
let fixationTrial = {
      type: jsPsychHtmlKeyboardResponse,
      stimulus: `+`,
      trial_duration: 500, // 500 milliseconds = .5 seconds
      choices: ['NO KEY']
}
It’s common in experiments to have a simple “fixation” character displayed briefly between conditions. In this example, our fixation character was a plus sign +.
A fixation break was necessary in this experiment because sometimes we might see two blue or two orange circles in a row. Without a fixation break, the participant could not distinguish these as two separate conditions.
In other experiments, the fixation break can simply act as a “palette cleanser” as you proceed through different stimuli.
The fixation break was created using the html-keyboard-response with the introduction of a trial_duration parameter which is set in milliseconds. In our example, we set it to 500 milliseconds which is .5 seconds.
Because this trial ended based on time rather than some key being pressed, we set the choices parameter to NO KEYS.
Setting a time limit on trials and waiting for key presses are not mutually exclusive. There may be instances where you wait for key presses but proceed to the next trial if a key is not pressed within a certain amount of time.